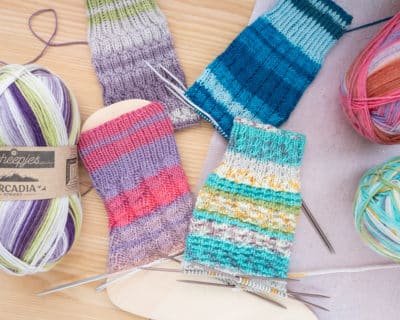


Knitting tutorial
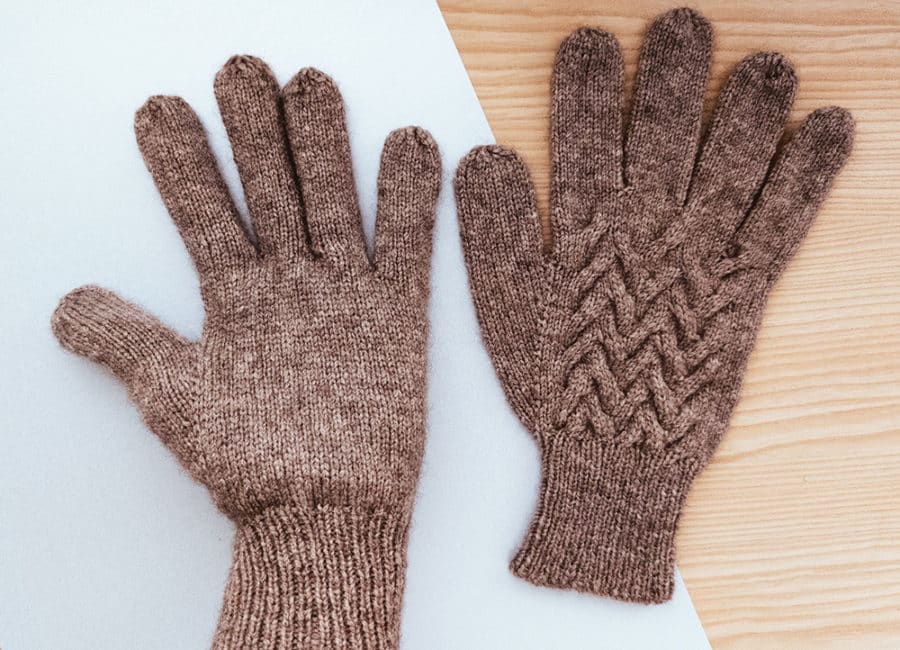
Knitting gloves with fingers for men with cable pattern
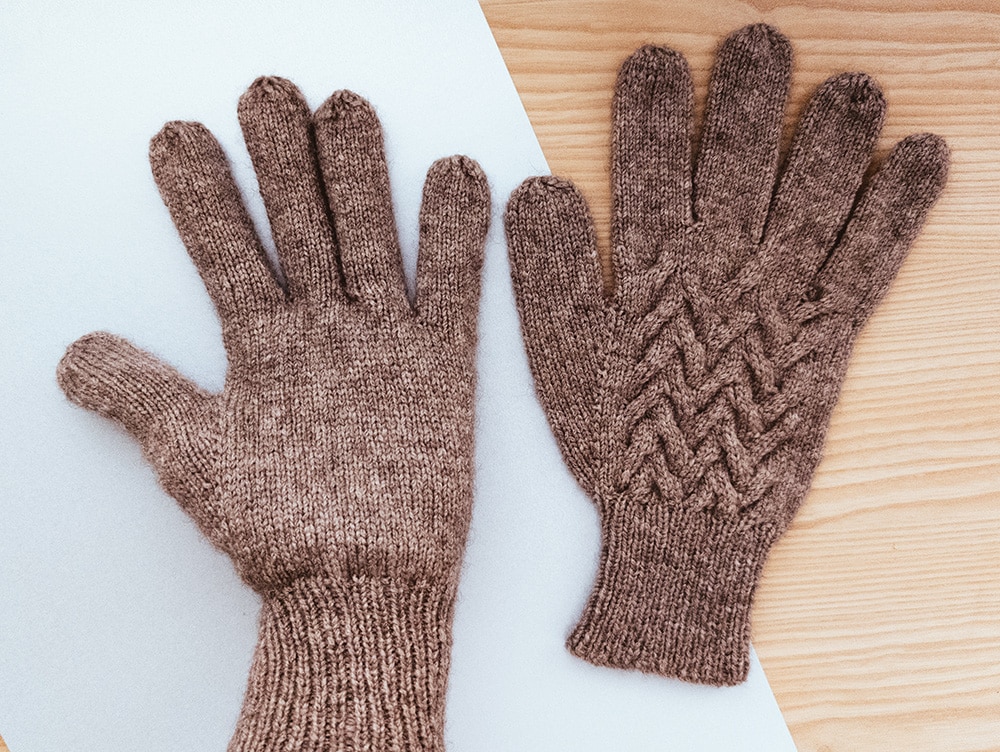
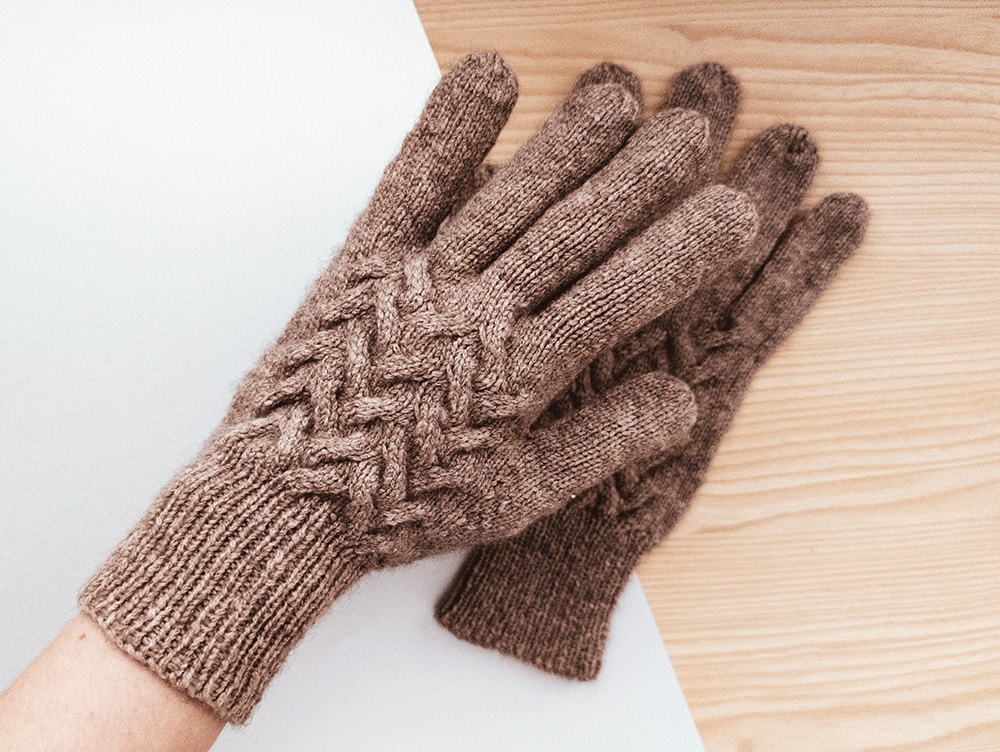
These men’s cable gloves feature continuous six-stitch cables for a refined, textured look. Knitted in soft, mulesing-free virgin wool, Lang Yarns Nomad, they combine comfort and elegance — perfect for everyday wear. The pattern includes three sizes for a tailored fit.
A tutorial by Glove Genie.
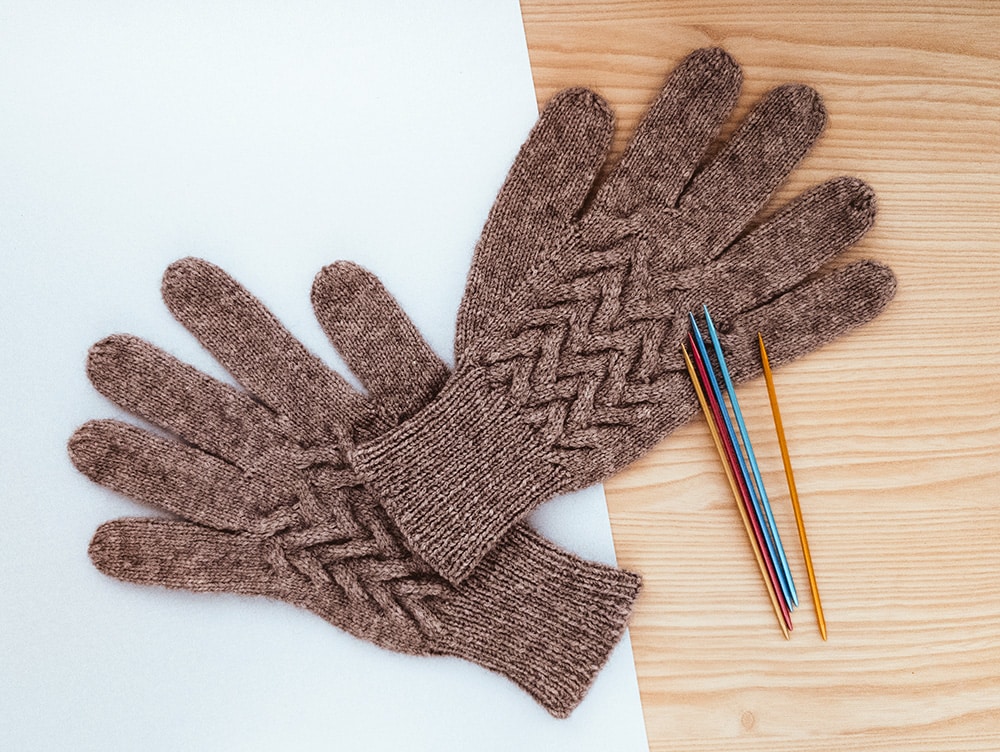
Table of contents
What you need:
- 2 (3, 3) balls of Lang Yarns Nomad, 137 yds / 0.9 oz (125 m / 25 g), Colour 0039
-
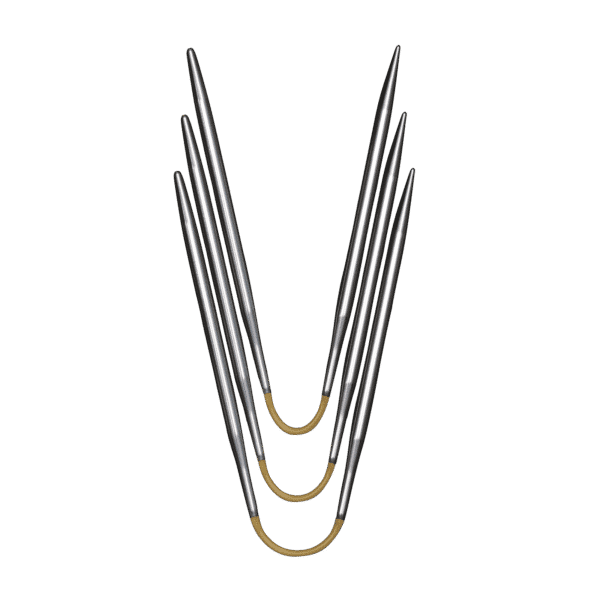
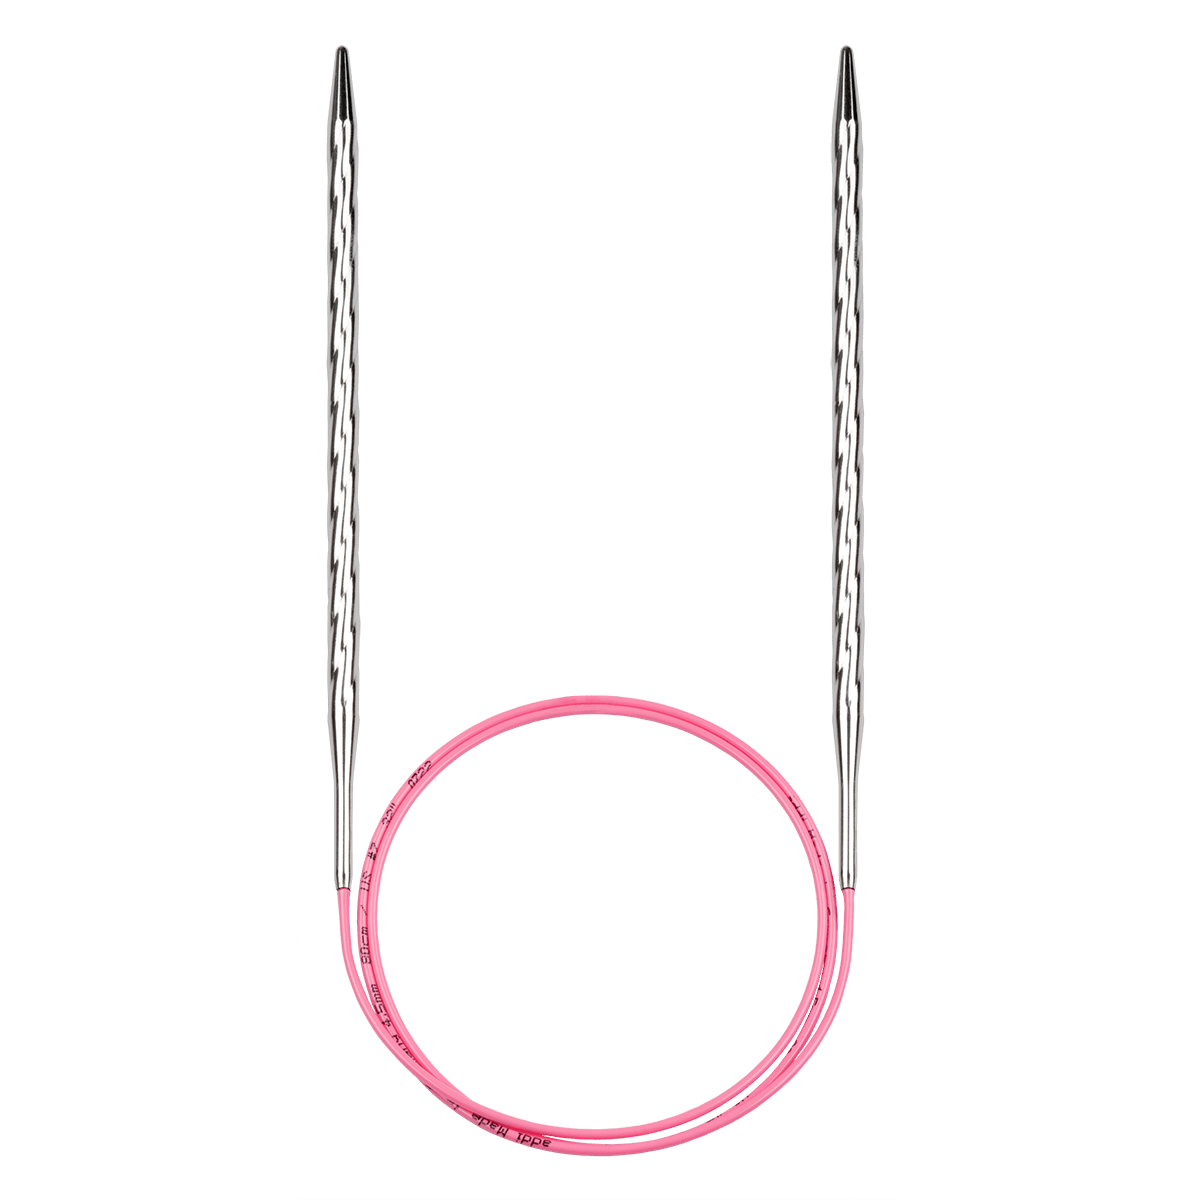
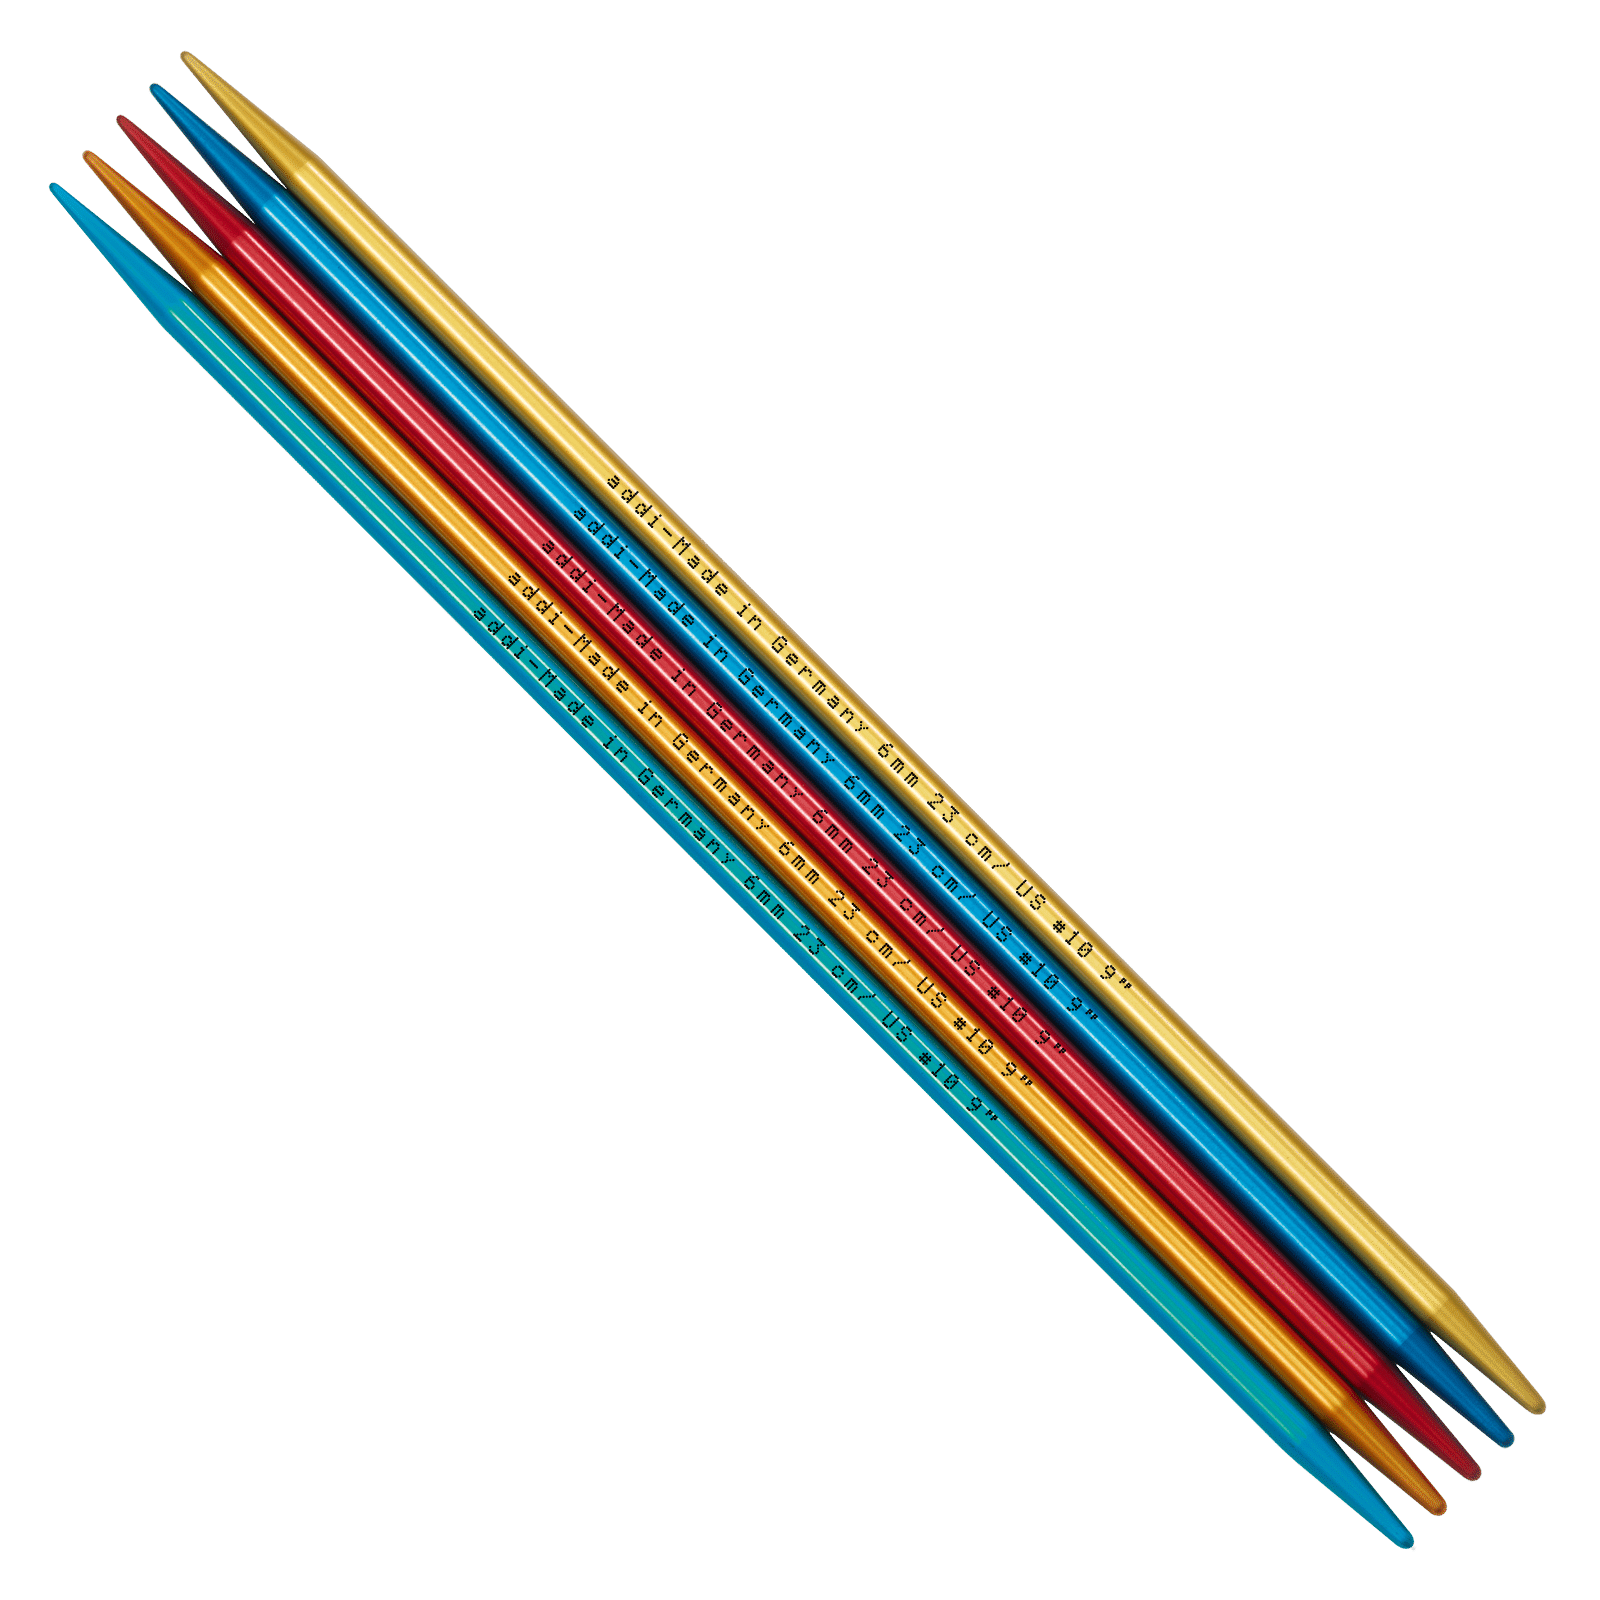
addiColibri Double-Pointed Needles 3.75 mm (US #5) or size needed to obtain tension
-
addiColibri Double-Pointed Needles 3.5 mm (US #4) or size needed to obtain tension
-
2 addiLove stitch markers
-
addiLoop Darning Needle or addiSmyrna Embroidery Needle
-
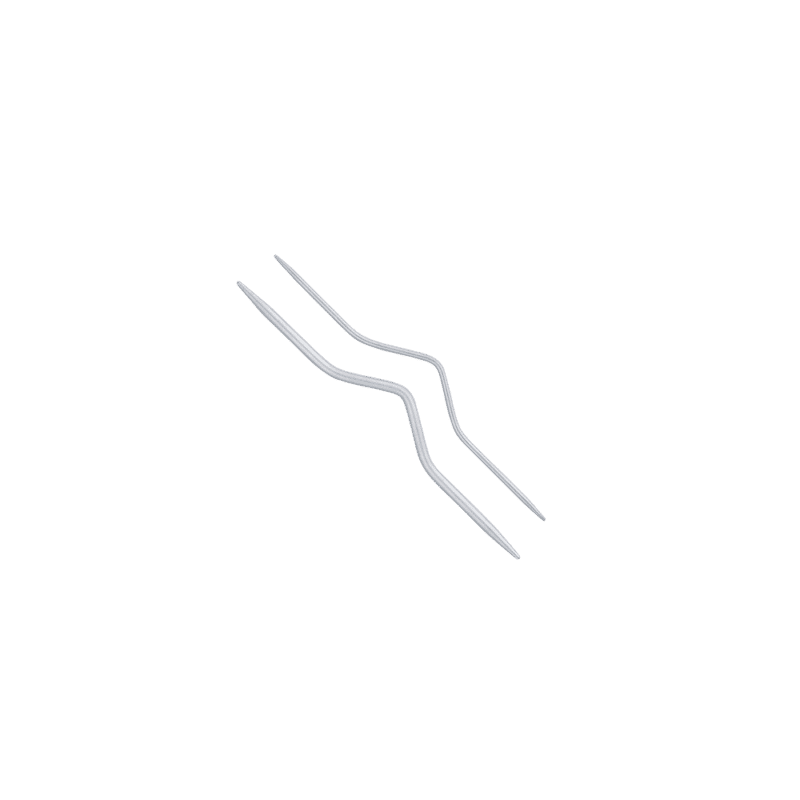
addiClassic Cable Needle
-
Scissors, e.g. addiGoldmarie
-
Waste yarn
Gauge:
- 10cm x 10cm = 29 sts and 39 rows in stockinette stitch, needles 3.75mm
-
10cm width = 33 sts in cable chart A, needles 3.75mm
Size EU:
- To fit palm size: 9 (10, 10.5) cm.
Dimensions:
- Final finished palm width: 10 (11, 11.5) cm
Measure your actual palm width at the widest point without adding ease. The pattern includes 1cm ease.
How it works
Knitting fingerless gloves for men
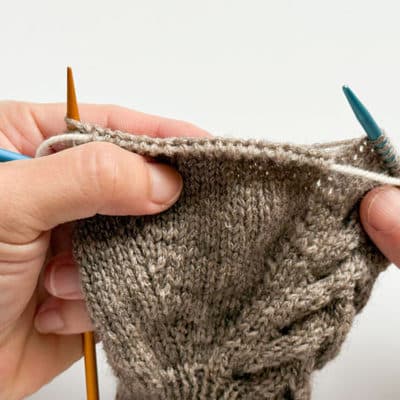
The gloves are worked in the round from the bottom up.
Both gloves share the same construction, but the cable panels are mirrored:
- The palm side is worked in stockinette stitch.
-
The back of the hand features the cable pattern (Chart A).
When the instructions specify Left glove or Right glove, follow the corresponding directions. If the step states Both sides, it applies to both gloves.
The thumb gusset increases are worked between two stitch markers.
Tip: When weaving in yarn ends, mimic the surrounding stitches for a neat, invisible finish.
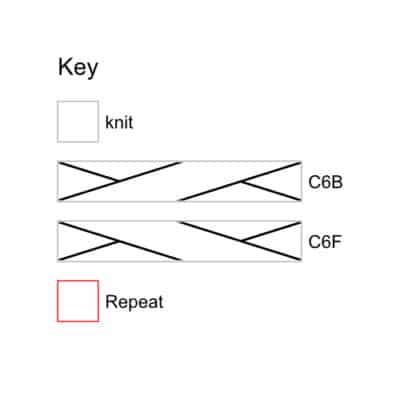
Chart A - Cable Pattern
Rnd 1: K2 (3, 4), *C6B, k6; rep from * once more, C6B, k2 (3, 4).
Rnd 2-4: and all even-numbered rounds: Knit.
Rnd 5: K2 (3, 4), *k6, C6F; rep from * once more, k8 (9, 10).
Rnd 6-8: and all even-numbered rounds: Knit.
These 8 rnds form patt and are repeated until the start of the little finger.
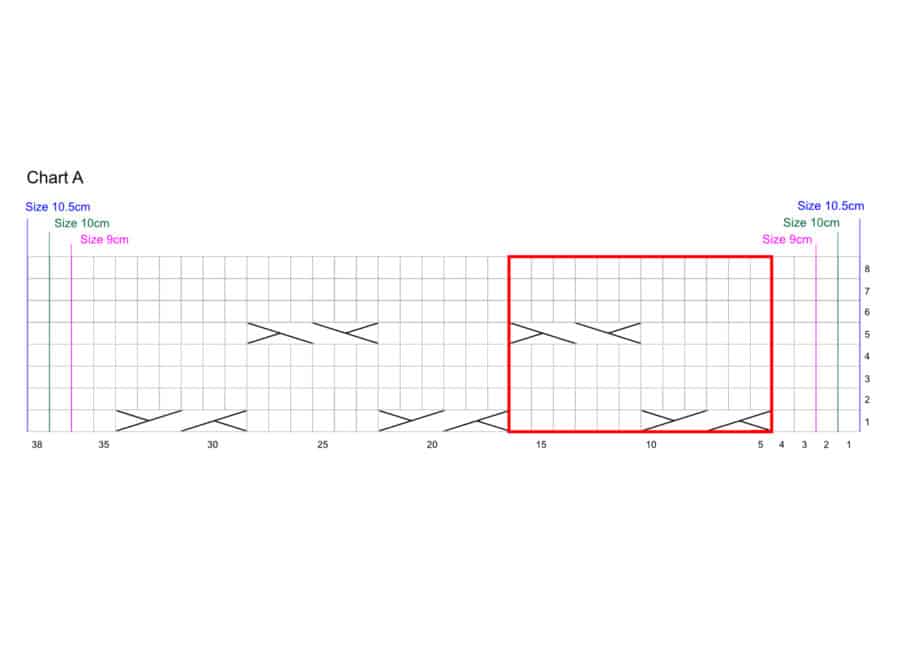
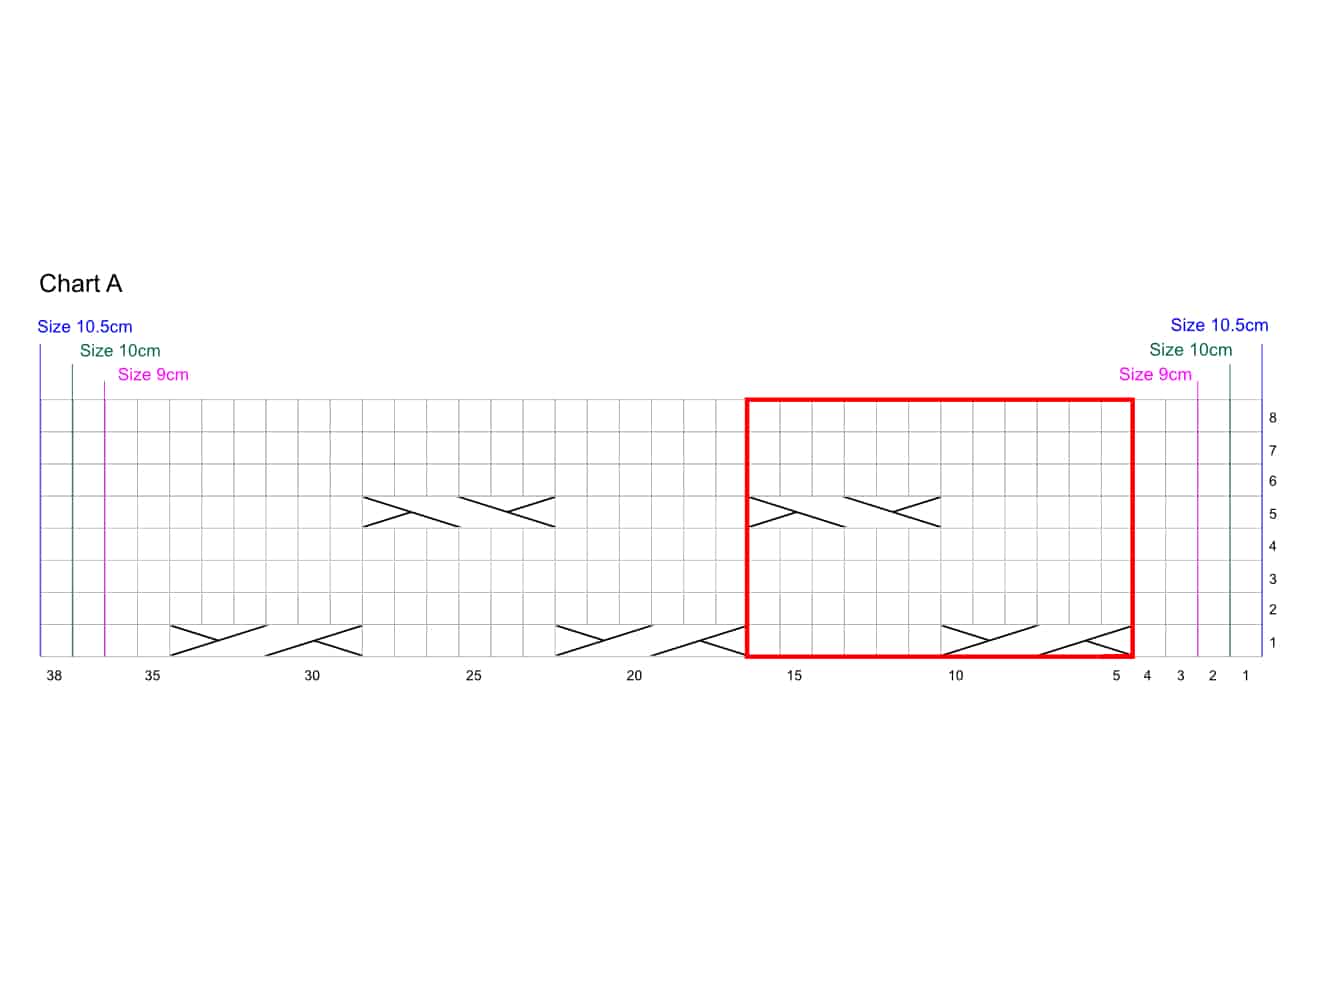

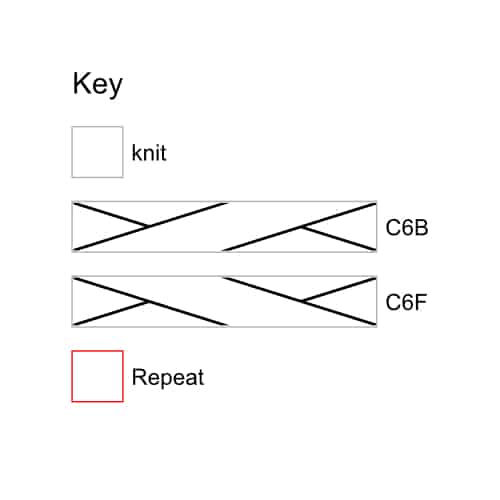
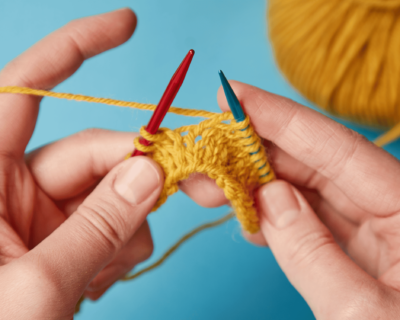
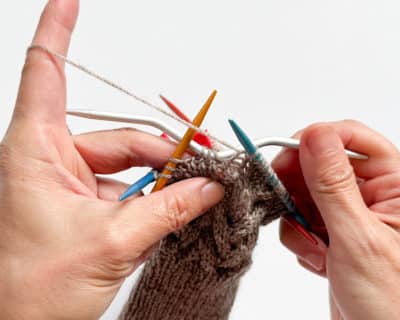
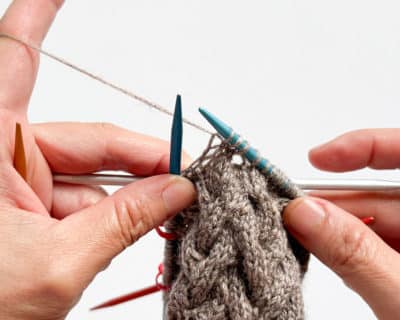
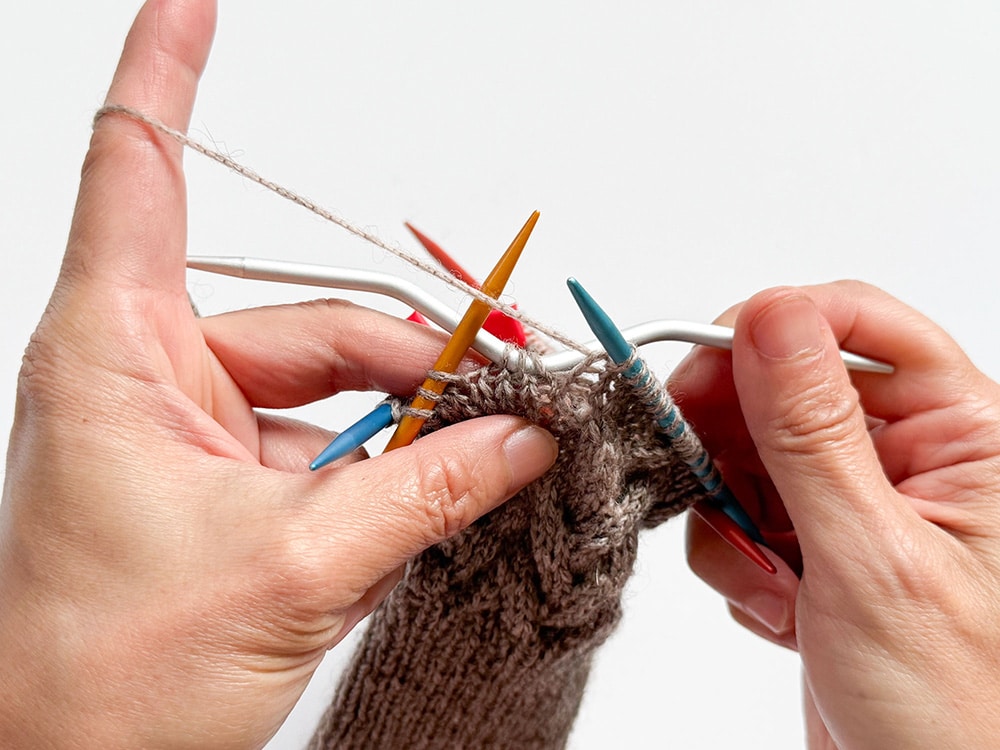
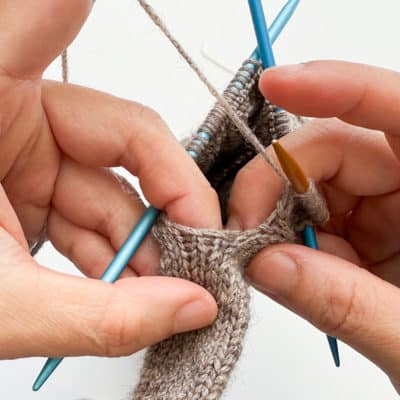
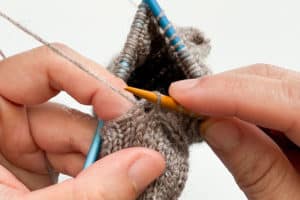
Technique
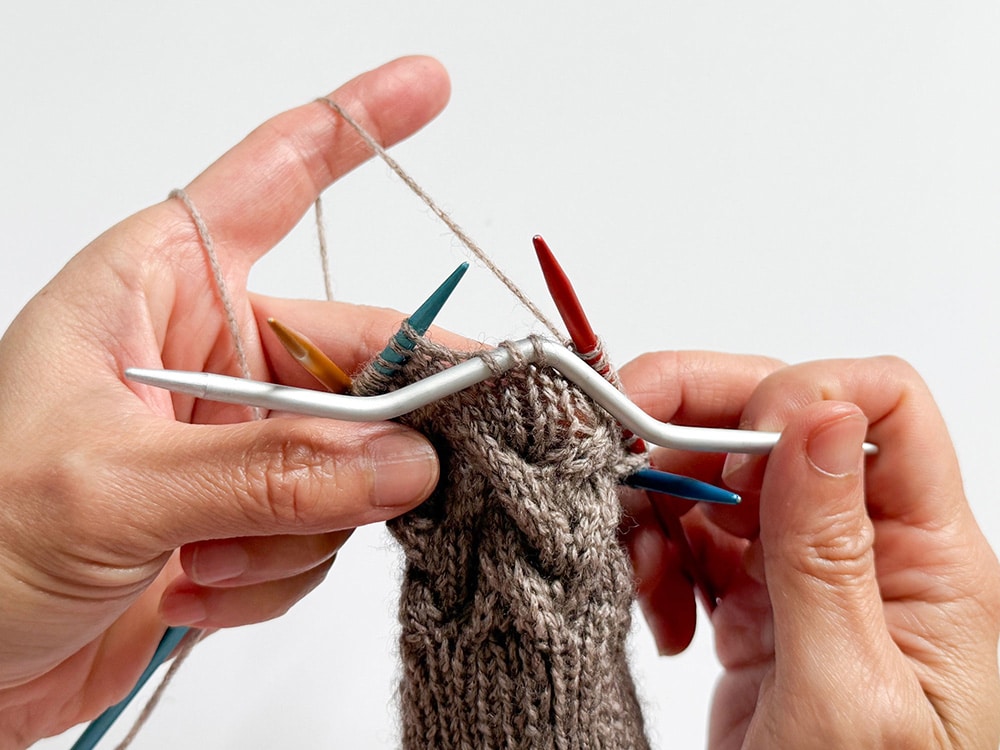
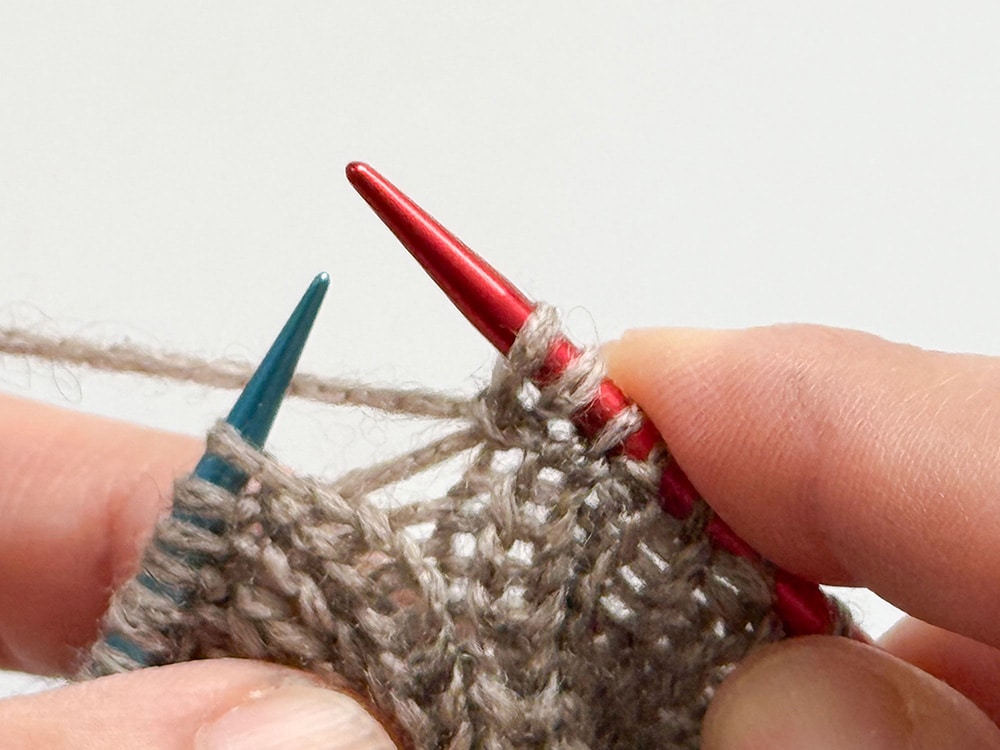
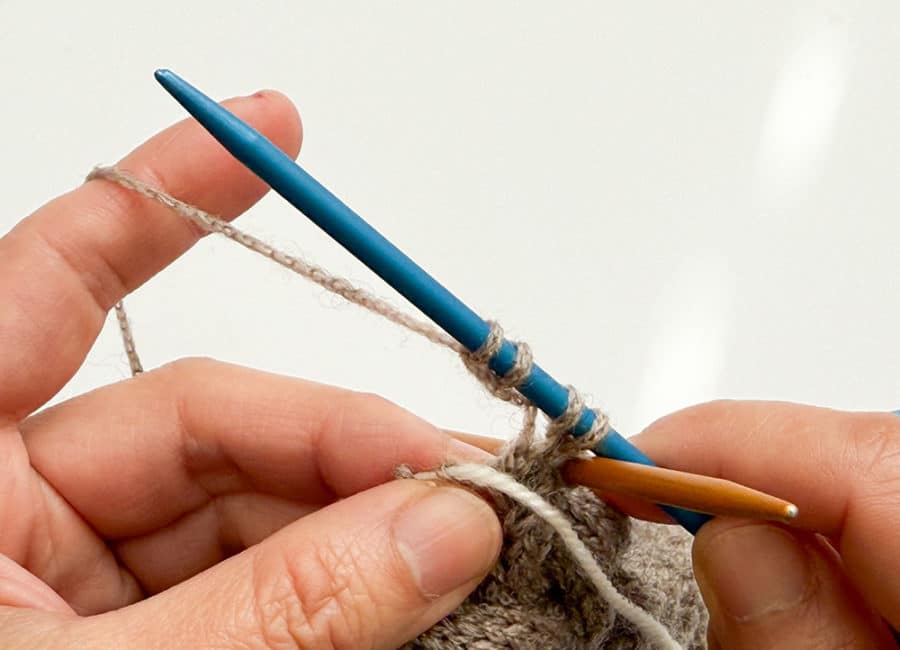
Cross 6 stitches to the right (6 sts crossed to the right)
- Transfer the next 3 stitches to a cable needle and place it behind the work.
- Work the next three stitches from the left knitting needle.
- Finally, knit off the three stitches on the cable needle.

Technique
Cross 6 stitches to the right (6 sts crossed to the right)
- Transfer the next 3 stitches to a cable needle and place it behind the work.
- Work the next three stitches from the left knitting needle.
- Finally, knit off the three stitches on the cable needle.
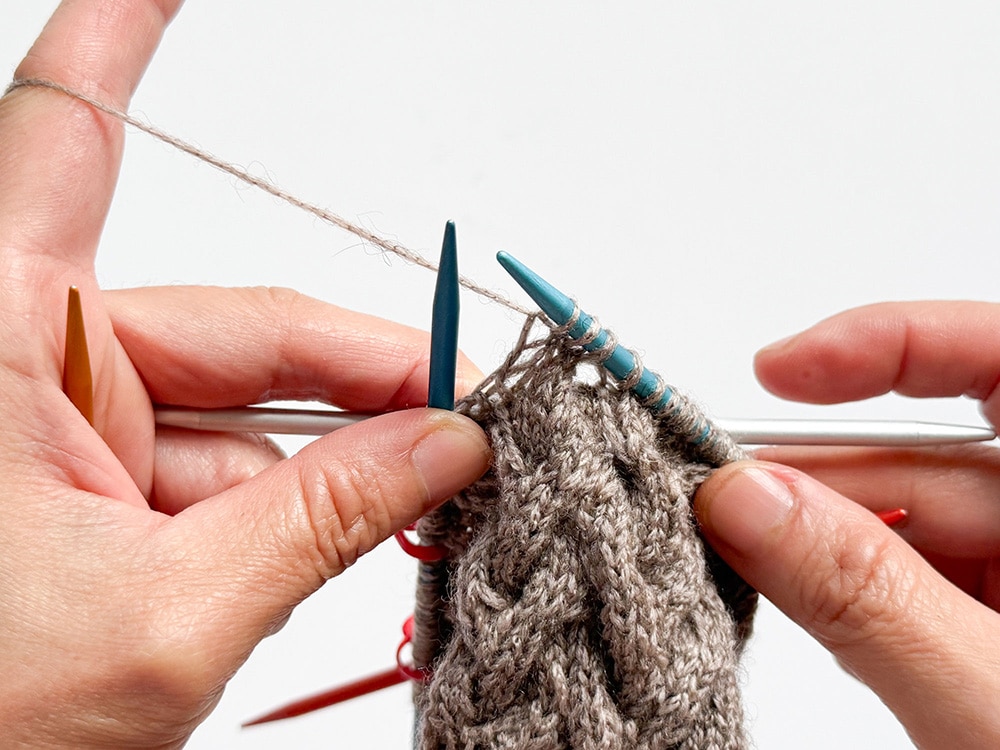

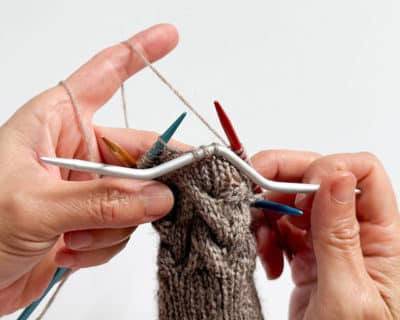

Technique
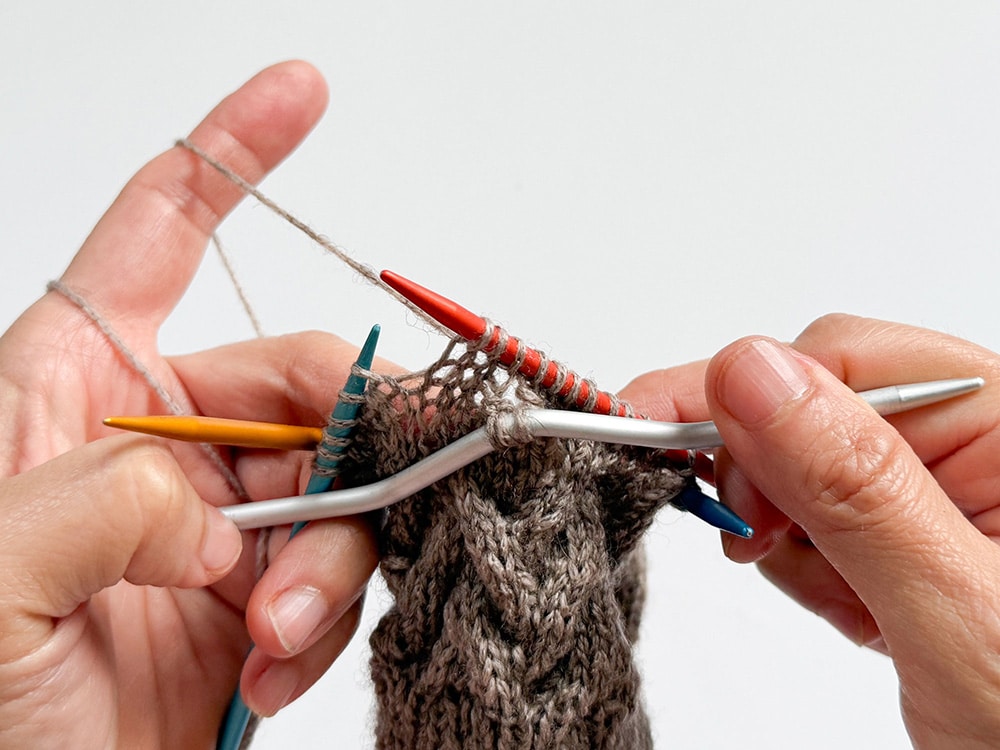
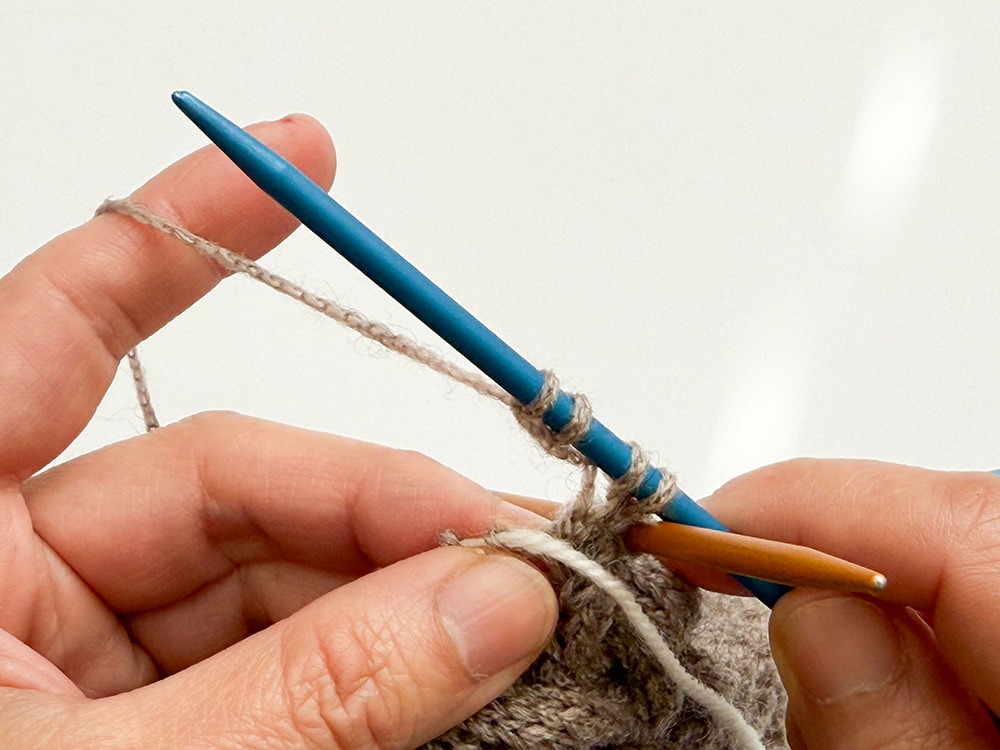
Cross 6 stitches to the left (6 sts crossed to the left)
- Transfer the next 3 stitches to a cable needle and place it in front of the work.
- Work the next three stitches from the left knitting needle.
- Finally, knit off the three stitches on the cable needle.

Technique
Cross 6 stitches to the left (6 sts crossed to the left)
- Transfer the next 3 stitches to a cable needle and place it in front of the work.
- Work the next three stitches from the left knitting needle.
- Finally, knit off the three stitches on the cable needle.
Step 1
The cuff
Both side
- Using 3.5 mm addiColibri DPNs, cast on 56 (60, 64) sts evenly using your preferred cast-on method.
- Be careful not to twist the sts, join the knitting in the round.
-
Work in Chart A for 7 (7.5, 7.5)cm.
Inc rnd:
- Work in rib for 7 (6, 8) sts, M1; rep from * sts 7 (8, 7) time(s) more. [=64 (69, 72) sts]
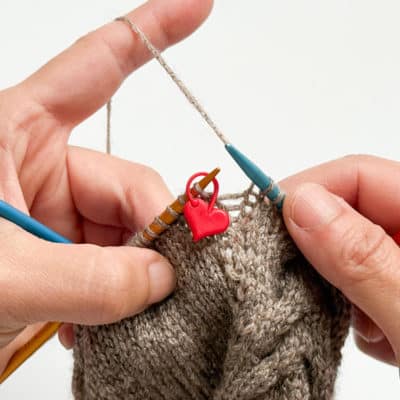
For Left Glove:
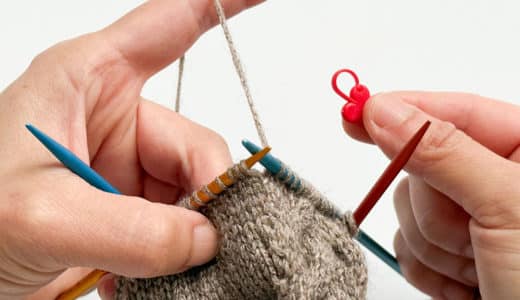
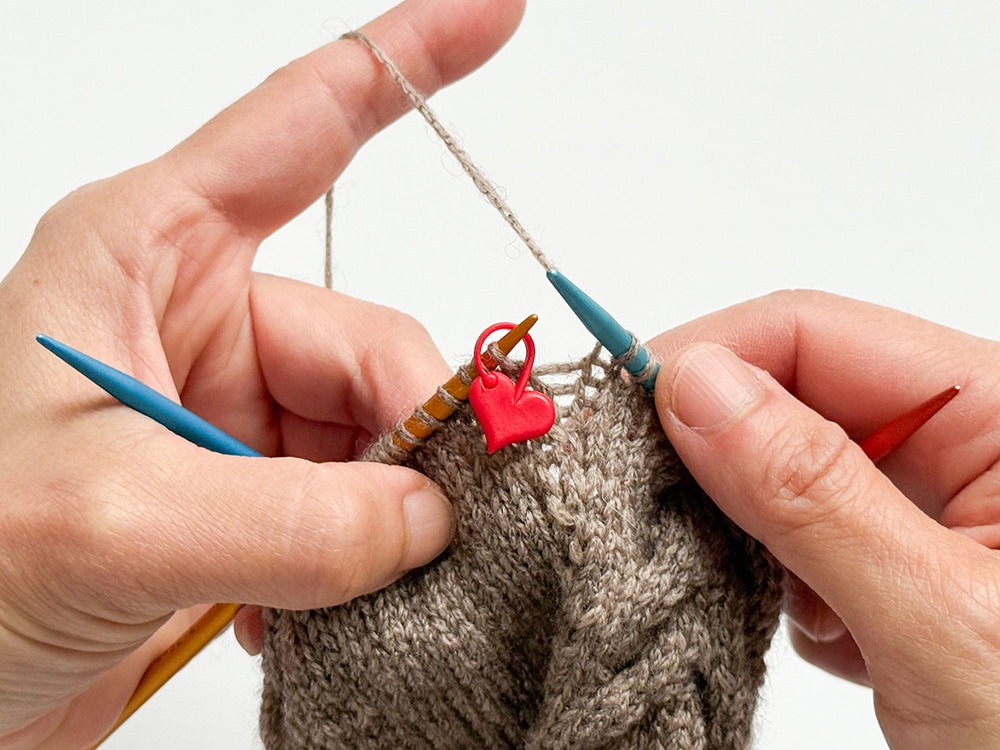
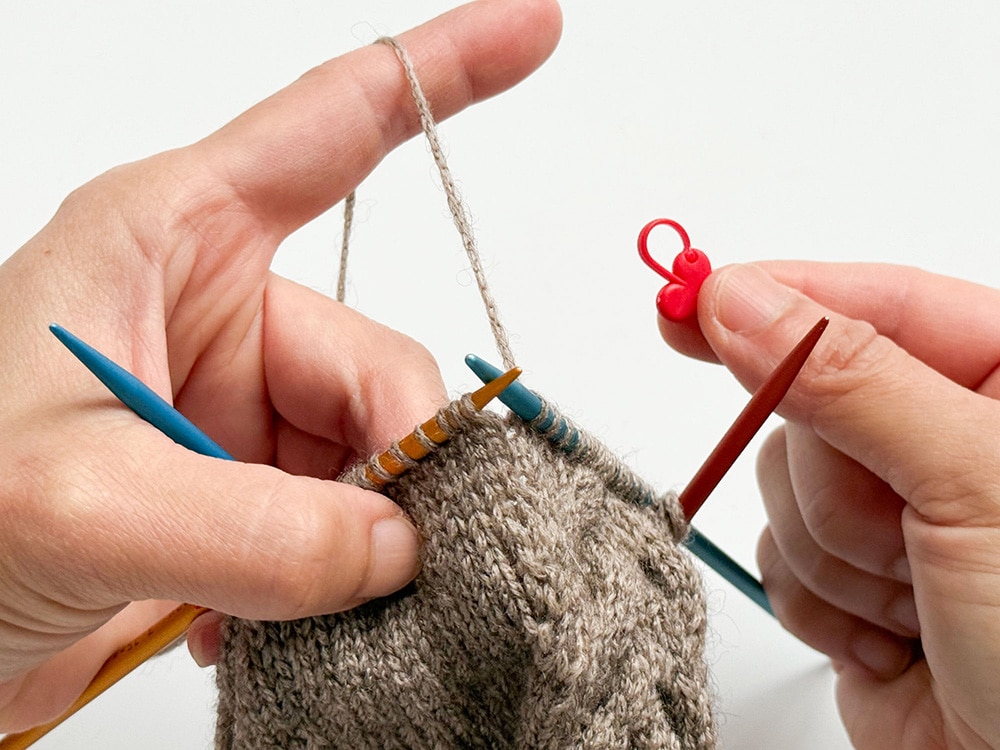
- Pm after 29 (32, 33) sts and after 30 (33, 34) sts. The markers indicate the beg and the end of thumb gusset.
For Right Glove:
- Pm after 34 (36, 38) sts and after 35 (37, 39) sts. The markers indicate the beg and the end of thumb gusset.

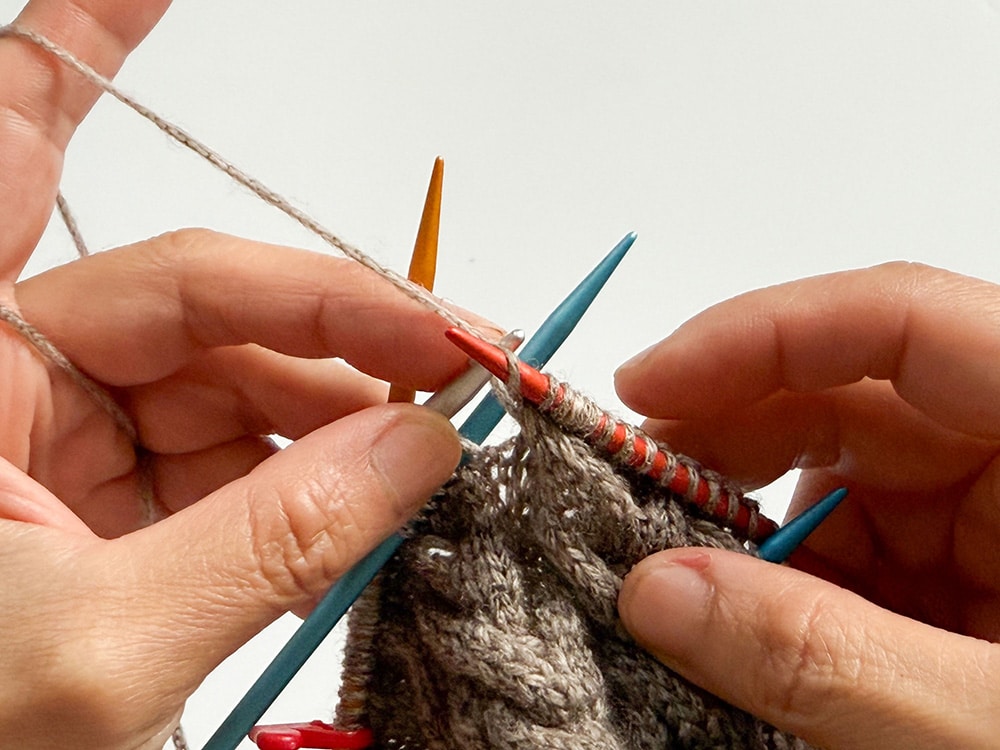
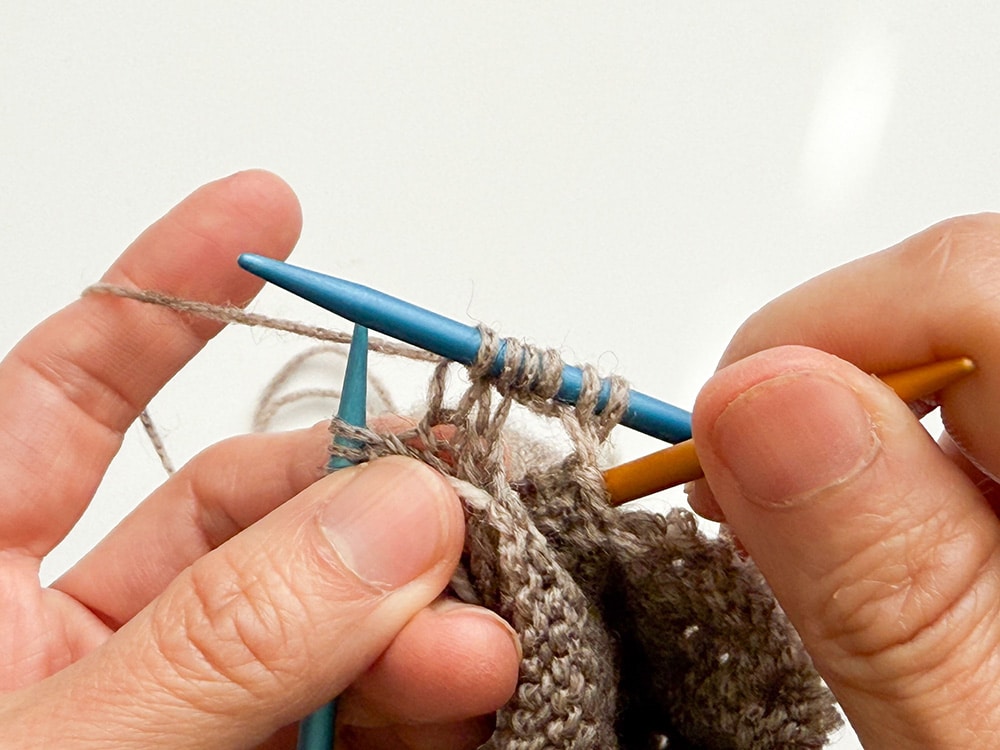
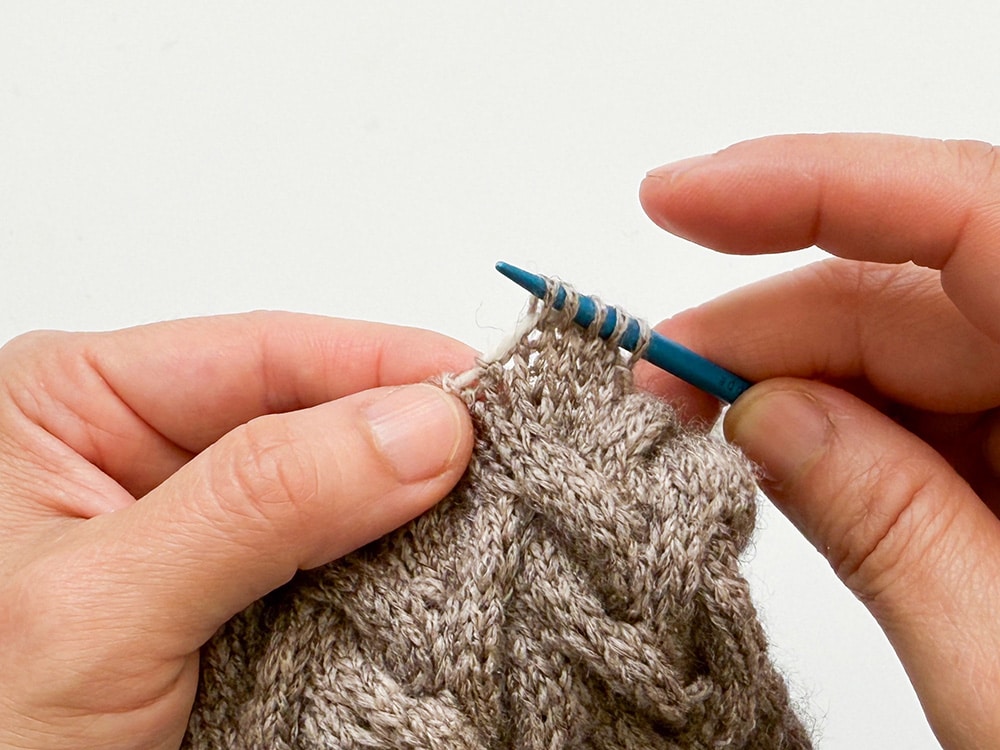
Technique
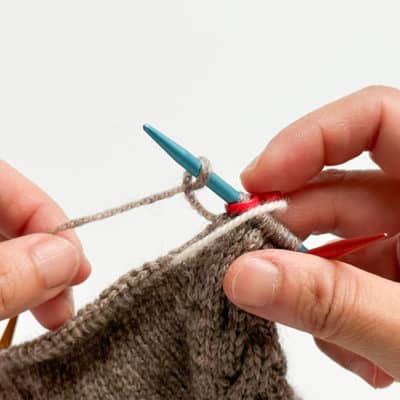
How to do M1L (make 1 stitch left slanting)
- Identify the strand of yarn between the needles.
- Lift this strand onto the right needle.
- Knit this strand.
- You have now made one stitch, twisted to the left.
Technique
How to do M1L (make 1 stitch left slanting)
- Identify the strand of yarn between the needles.
- Lift this strand onto the right needle.
- Knit this strand.
- You have now made one stitch, twisted to the left.

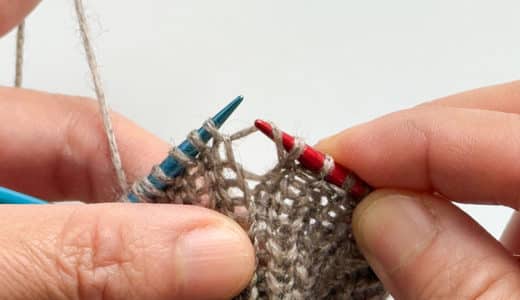
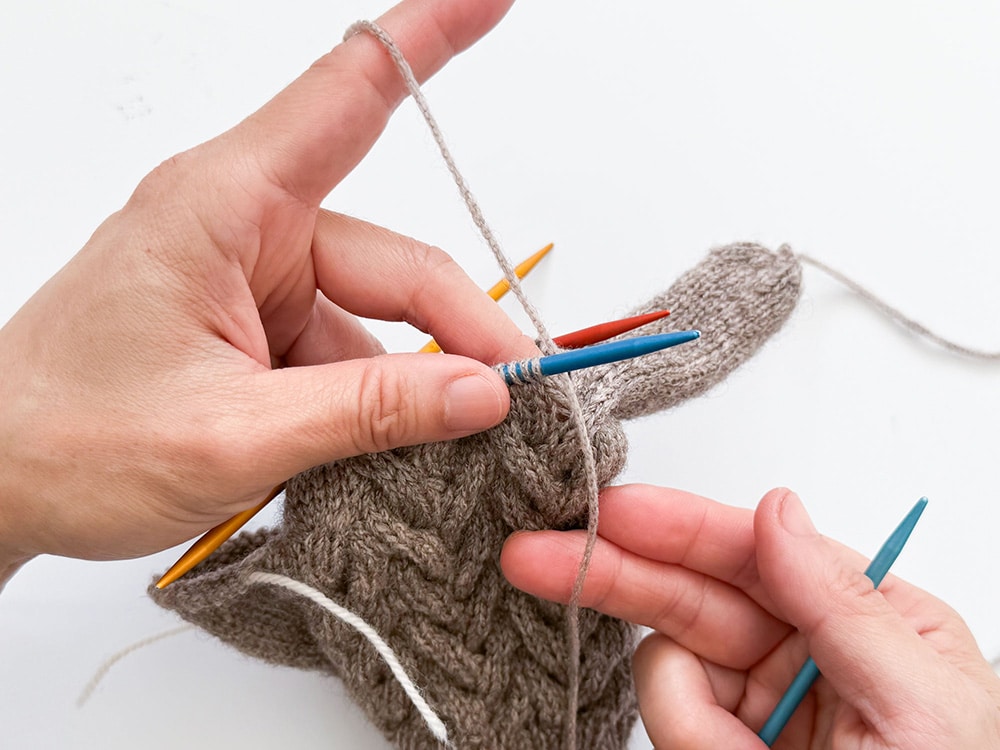
Technique
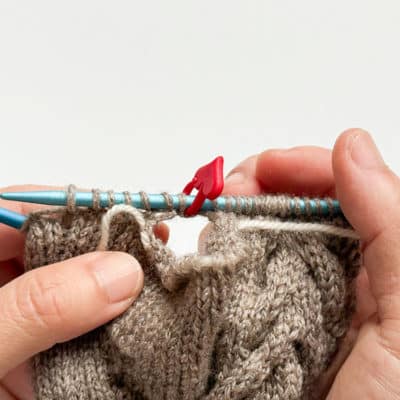
How to do a M1R (Make 1 Right-slanting stitch)
- Identify the strand of yarn between the needles.
- Lift this strand onto the left needle.
- Knit this strand.
- You have now made one stitch, twisted to the right.
Technique
How to do a M1R (Make 1 Right-slanting stitch)
- Identify the strand of yarn between the needles.
- Lift this strand onto the left needle.
- Knit this strand.
- You have now made one stitch, twisted to the right.
Step 2
Thumb gusset
Change to 3.75 mm addiColibri DPNs.
Left Glove – Gusset Inc
- Inc rnd: Knit to m, slm, M1L, knit to m, M1R, slm, chart A to end.
-
Non-inc rnd: (Knit to m, slm) twice, chart A to end.
Right Glove – Gusset Inc
- Inc rnd: Chart A to m, slm, M1L, knit to m, M1R, slm, knit to end.
-
Non-inc rnd: Chart A to m, slm, knit to m, knit to end.
Both side
- Work the thumb gusset inc rnd every 3 (3, 3)rnds 7 (9, 7) time(s).
-
Then every 4 (4, 4)rnds 2 (1, 3) time(s). 18 (20, 20) sts inc’d total.
There should be 19 (21, 21) sts in between the markers. [=64 (69, 72) sts]
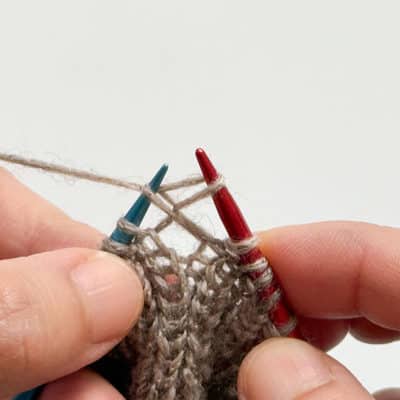
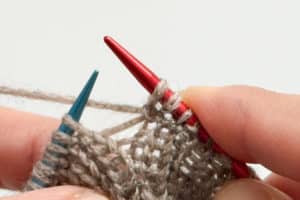
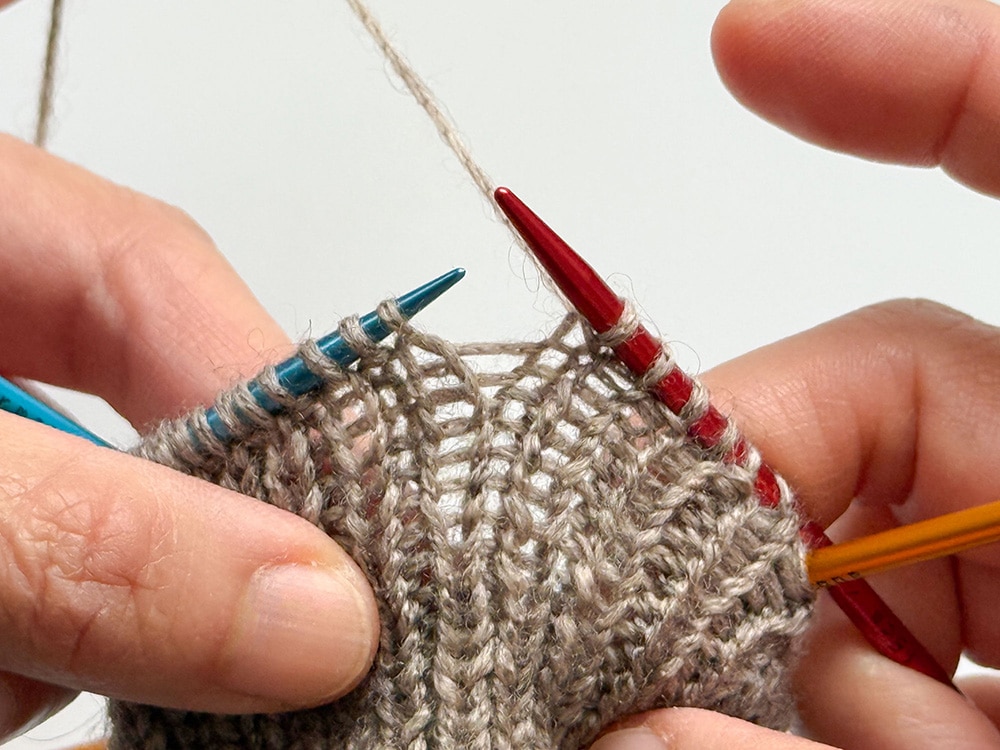
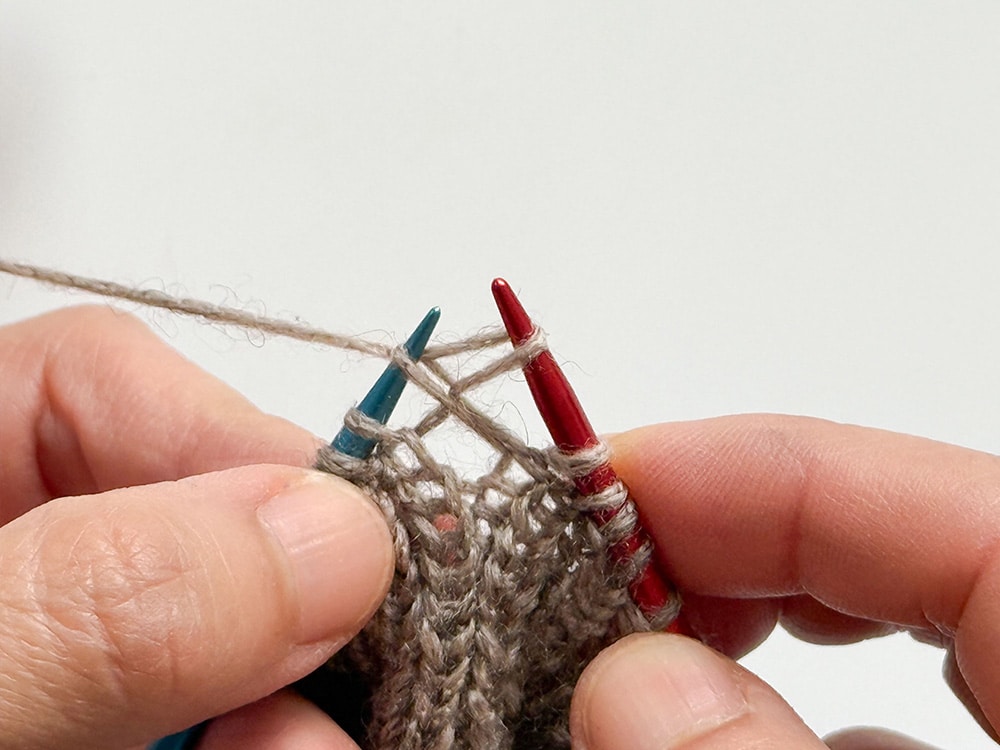
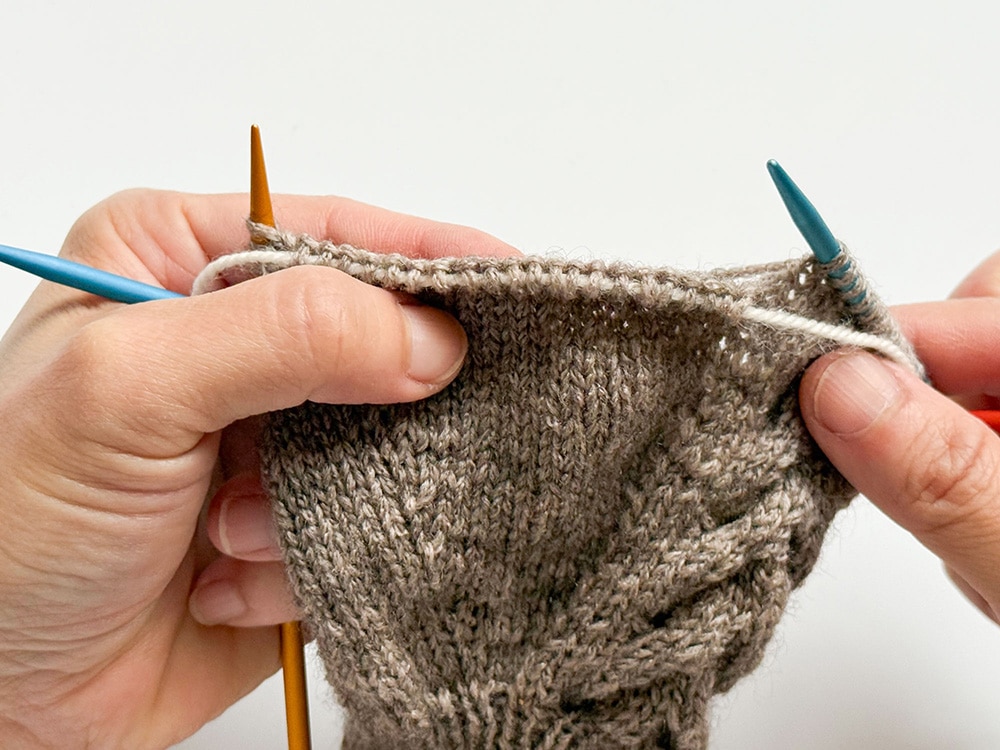
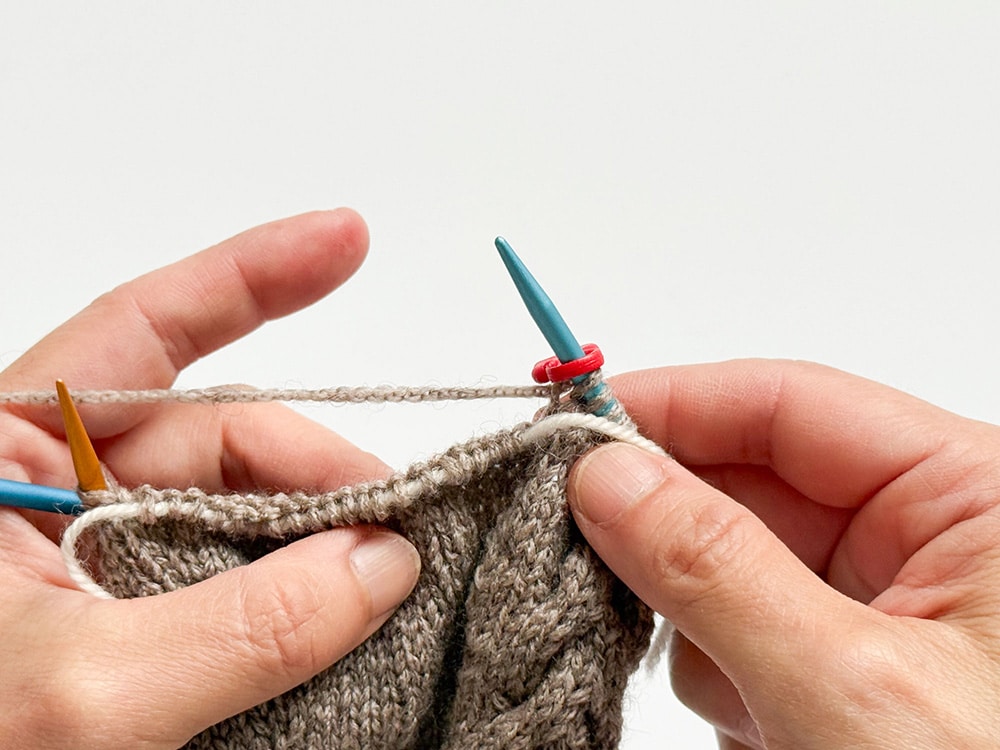
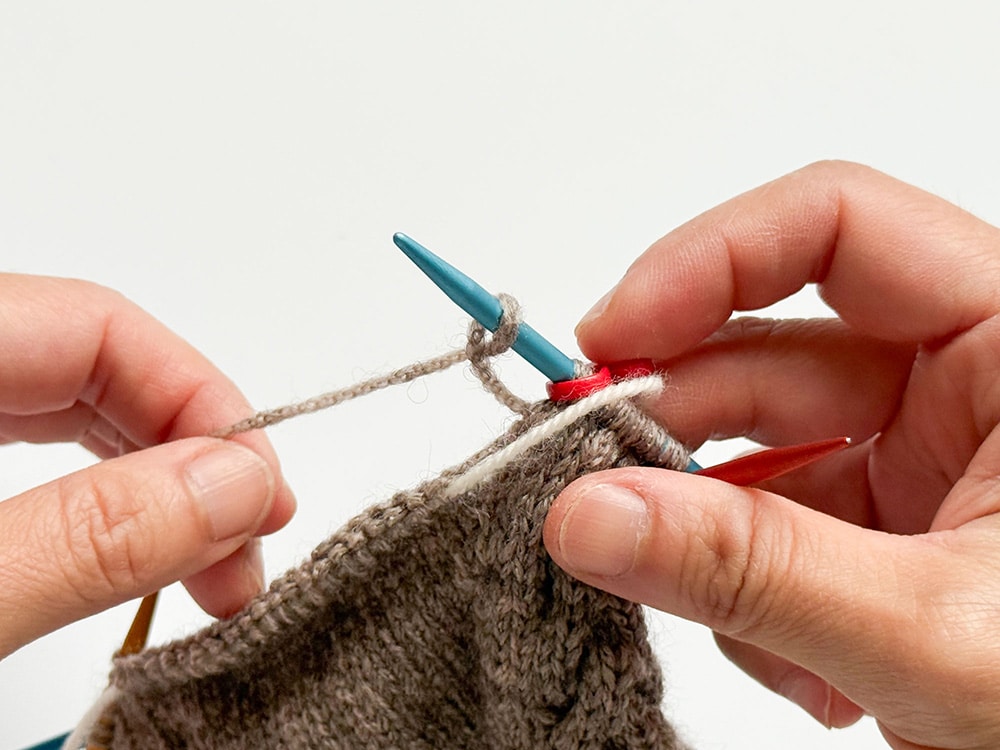
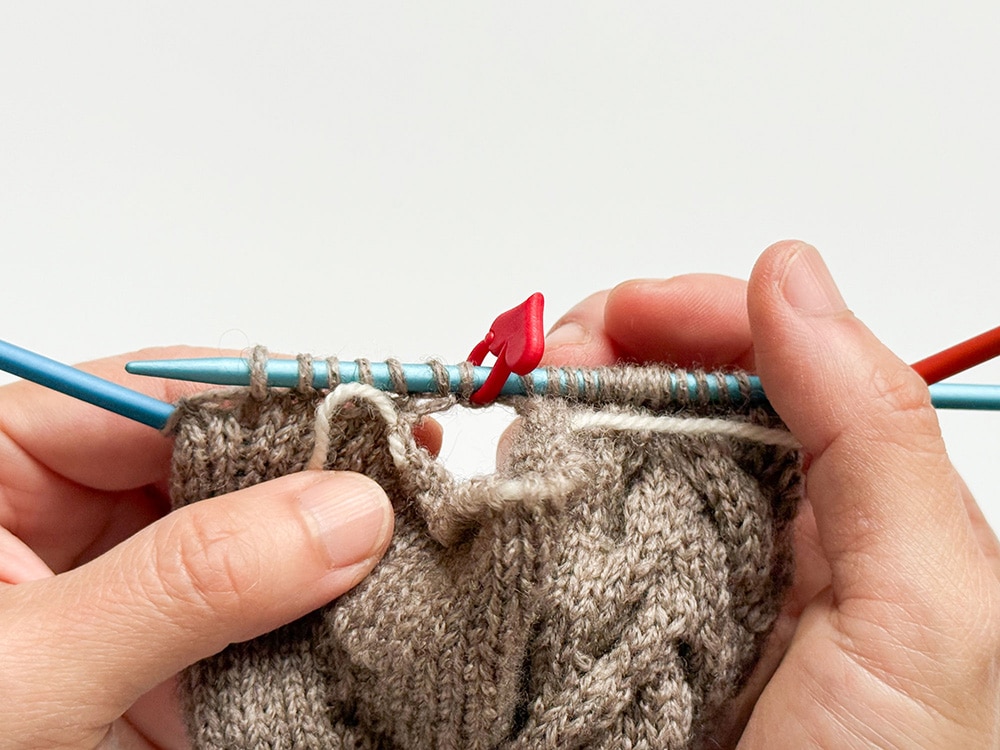
Divide for Thumb
For Left Glove:
- Knit to m, remove m, place the next 19 (21, 21) sts onto waste yarn, M1 using loop method, slm, chart A to end.
-
The marker indicates the beginning of chart A.
[=64 (69, 72) M]
For Right Glove:
- Chart A to m, remove m, M1 using the loop method, place the next 19 (21, 21) sts onto a piece of waste yarn, slm, knit to end.
-
The marker indicates the end of chart A. [=64 (69, 72) sts]
[=64 (69, 72) M]
Both side
- Cont working in patt until the glove measures 10 (10.5, 11.5)cm from the top of the cuff, approx. 9 (9, 11) rnds.
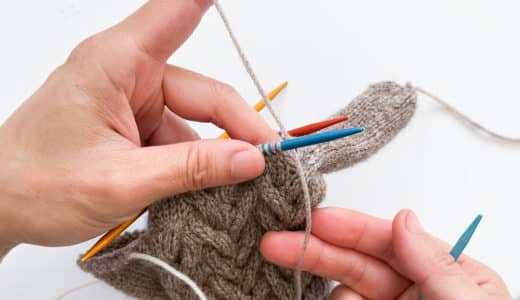
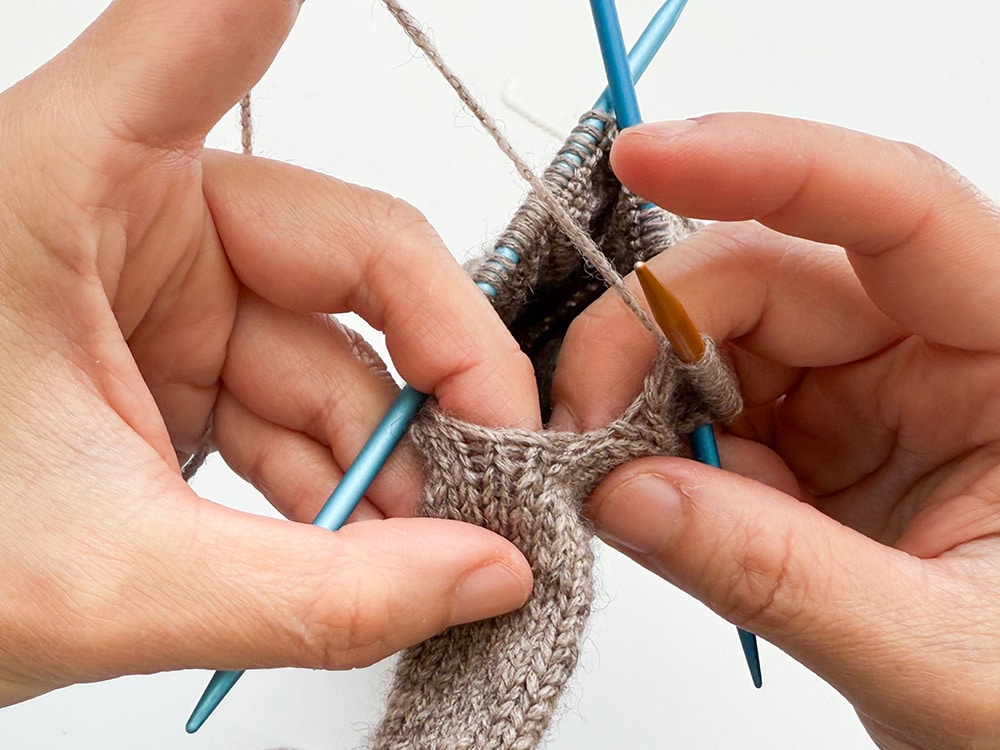
Step 3
Little finger
For Left Glove:
- Knit the first 7 (8, 8) sts, place the next 49 (52, 55) sts onto a piece of waste yarn, removing the all markers, M3 (2, 2) sts using the loop method, work to end.
-
[=18 (19, 19) sts for the little finger]
For Right Glove:
- Knit the first 8 (9, 9) sts, place the next 49 (52, 55) sts onto a piece of waste yarn, removing the all markers, M3 (2, 2) sts using the loop method, work to end.
-
[=18 (19, 19) sts for the little finger]
Tip: Work the first few sts over two DPNs. Placing a couple of sts on the second needle helps stabilise Your work and makes the loop cast-on easier. This will also make the following rnd easier to knit.
Both side
- Continue in st st until the finger meas 6.5 (7.5, 8) cm from its base, approx. 26 (30, 32) rnds.
-
Dec rnd 1: K2tog 9 (8, 8) times, k3tog 0 (1, 1) time. [=9 (9, 9) sts]
-
Dec rnd 2: K2tog 3 (3, 3)times, k3tog 1 (1, 1) time. [=4 (4, 4) sts]
-
Gather the stitches to close the top to finish.

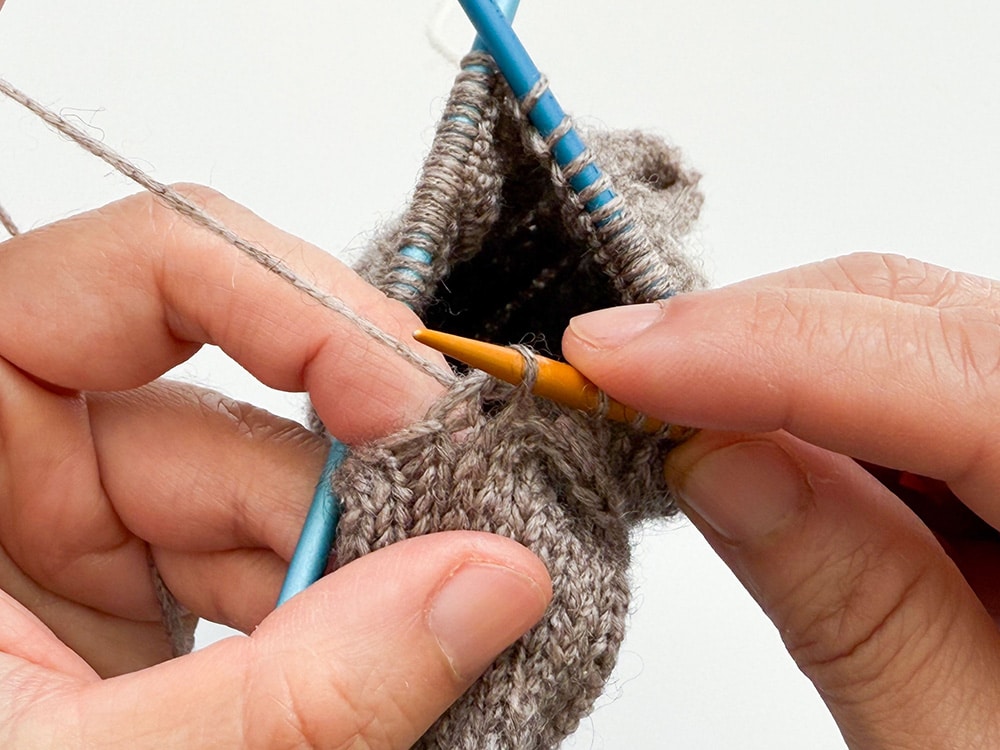
Step 4
Vertical Offset at Finger Bases
Both side
- Place the rested stitches onto the larger needles. [=49 (52, 55) sts]
-
Attach a new yarn, leaving approximately 30cm of tail on the outside for finishing later.
-
Next rnd: St st to end, picking up 2 (2, 2)sts from the base of the little finger. [=51 (54, 57) sts]
-
Work 3 (3, 3)rnds in st st.
Part 5
Ring finger
For Left Glove:
- Knit the first 7 (8, 8) sts, place the next 34 (35, 38) sts onto a piece of waste yarn, M2 (1, 2) sts using the loop method, work to end.
-
[= 19 (20, 21) stitches for the ring finger]
Right Glove:
- Knit the first 8 (9, 9) sts, place the next 34 (35, 38) sts onto a piece of waste yarn, M2 (1, 2) sts using the loop method, work to end.
-
[= 19 (20, 21) stitches for the ring finger]
Notiz: As for the little finger, work the sts over the first two DPNs. Having a few sts on the second needle helps stabilise the loop cast-on and makes the next rnd easier.
Both side
- Continue in st st until the finger meas 8 (8.5, 9.5) cm from its base, approx.32 (34, 38) rnds.
-
Dec rnd 1: K2tog 8 (10, 9) times, k3tog 1 (0, 1) time. [=9 (10, 10) sts]
-
Dec rnd 2: K2tog 3 (5, 5) times, k3tog 1 (0, 0) time. [4 (5, 5) sts]
-
Gather the stitches to close the top to finish.
Part 6
Middle finger
For Left Glove:
- Place the rest of 17 (18, 19) sts onto a piece of waste yarn.
-
Place the rest of 17 (18, 19) sts onto a piece of waste yarn.
-
Attach a new yarn, leaving approximately 30cm of tail on the outside for finishing later.
-
Work the first 8 (8, 9) sts, M1 (1, 1) sts using the loop method, knit to end.
-
Pick up 1 (2, 1) sts from the base of the ring finger.
-
[=19 (20, 21) stitches for the middle finger]
For Right Glove:
- Place the first 9 (9, 10) sts and the last 8 (8, 9) sts onto larger DPNs.
-
Place the rest of 17 (18, 19) sts onto a piece of waste yarn.
-
Attach a new yarn, leaving approximately 30cm of tail on the outside for finishing later.
-
Work the first 9 (9, 10) sts, M1 (1, 1) sts using the loop method work to end.
-
Pick up 1 (2, 1) sts from the base of the ring finger.
-
[=19 (20, 21) stitches for the middle finger]
Both side
- Continue in st st until the finger meas 8.5 (9.5, 10) cm from its base, approx. 34 (38, 39) rnds.
-
Dec rnd 1: K2tog 8 (10, 9) times, k3tog 1 (0, 1) time. [=9 (10, 10) sts]
-
Dec rnd 2: K2tog 3 (5, 5) times, k3tog 1 (0, 0) time. [4 (5, 5) sts]
-
Gather the stitches to close the top to finish.
Part 7
Index finger
Both side
- Place the held sts onto the larger needles. Attach a new yarn, leaving approximately 30 cm of tail for finishing later. Work to end.
-
Attach a new yarn, leaving approximately 30cm of tail on the outside for finishing later.
-
Knit one round in stockinette stitch:
-
Pick up 2 (2, 2)sts from the base of the middle finger. [=19 (20, 21) sts for the index finger]
-
Continue in st st until the finger meas 8 (8.5, 9.5) cm from its base, approx.32 (34, 38) rnds.
-
Dec rnd 1: K2tog 8 (10, 9) times, k3tog 1 (0, 1) time. 9 (10, 10) sts rem.
-
Dec rnd 2: K2tog 3 (5, 5) times, k3tog 1 (0, 0) time. 4 (5, 5) sts rem.
-
Gather the stitches to close the top to finish.
Part 8
Knitting thumb
Both side
- Place the held sts onto the larger needles. Attach a new yarn, leaving approximately 30 cm of tail for finishing later. Work to end.
-
Attach a new yarn, leaving approximately 30cm of tail on the outside for finishing later.
-
Knit one round in stockinette stitch:
-
Pick up 1 (1, 1) st from the base of the index finger. [=20 (22, 22) sts for the thumb]
-
Continue in st st until the finger meas 6 (6.5, 7) cm from its base, approx. 24 (26, 28) rnds.
-
Dec rnd 1: K2tog 10 (11, 11) times. [=10 (11, 11) sts]
-
Dec rnd 2: K2tog 5 (4, 4) times, k3tog 0 (1, 1) time. [=5 (5, 5) sts].
-
Gather the stitches to close the top to finish.
Part 9
Finishing
- Weave in all loose ends on the wring side of the work.
-
Use the yarn tails to close any small gaps between fingers by weaving in and out neatly.
-
Block and lightly steam-press both gloves to finish.
Part 9
Finishing
- Weave in all loose ends on the wring side of the work.
-
Use the yarn tails to close any small gaps between fingers by weaving in and out neatly.
-
Block and lightly steam-press both gloves to finish.
Share your progress with us:
Are you knitting this project currently? Share the result on Instagram at @addi_by_selter @glovegenie or share it with us in our Facebook group "addiFriends".
Design: Glove Genie – Kyoko Nakayoshi
Abbreviations
- beg = begin/begins/beginning
-
DPN = double-pointed needles
-
inc = increase
-
1 zun = make 1 stitch (i.e. increase 1 stitch)
-
sm = stitch marker
-
MMS = place marker
-
MM abh = Remove stitch markers
-
M1L = make 1 stitch left slanting
-
M1R = make 1 stitch right slanting
-
M1Loop = make 1 stitch using loop method
-
rep = repeat
-
rnd/rnds = round(s)
-
gl re = stockinette stitch
-
sts = stitches
-
6M re verkr = Cross 6 stitches to the right
-
6M li verkr = Cross 6 stitches to the left