

Tutorial: Garter stitch for beginners
Garter stitch is a very simple knitting technique and perfect for beginners. In this tutorial, we explain step by step how the pattern is created, what makes it special and what it is used for.
Difficulty: ♥♡♡♡♡

What does garter stitch mean?
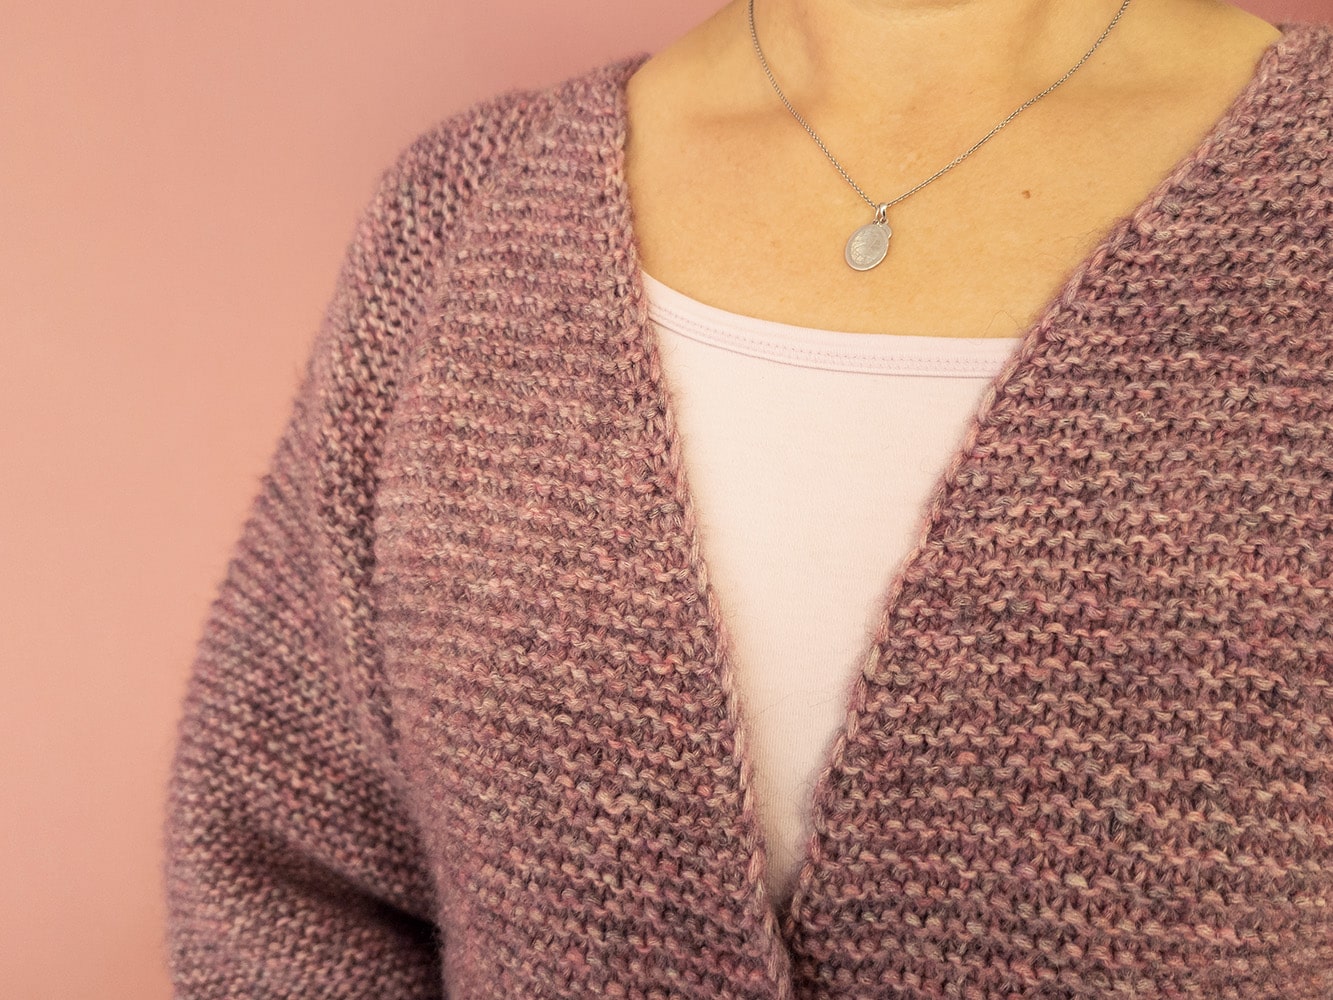
Garter stitch is one of the simplest and at the same time most versatile knitting patterns. In garter stitch, only knit stitches are knitted in rows – in both the right-side and the wrong-side row. The result is an even, wavy pattern that looks identical on both sides of the knitted piece. Thanks to its density and texture, garter stitch looks sturdy and is therefore ideal for beginners who want to learn to knit.

What does garter stitch mean?
Garter stitch is one of the simplest and at the same time most versatile knitting patterns. In garter stitch, only knit stitches are knitted in rows – in both the right-side and the wrong-side row. The result is an even, wavy pattern that looks identical on both sides of the knitted piece. Thanks to its density and texture, garter stitch looks sturdy and is therefore ideal for beginners who want to learn to knit.


Garter stitch –
Step by Step
How do you knit garter stitch in rows?
The principle of garter stitch is very simple:
- Right side: Hold the needle with the stitches in the left hand and knit all stitches as knit stitches.
- Turn the work: After knitting the row, the knitted piece is turned so that the back of the work faces you.
- Wrong side: In the wrong-side row, all stitches are also knitted as knit stitches.
- Repeat: Repeat this process until the knitted piece has reached the desired length.
As knit stitches are always knitted, the result is an even pattern on both sides.


How do you knit garter stitch in rows?
The principle of garter stitch is very simple:
- Right side: Hold the needle with the stitches in the left hand and knit all stitches as knit stitches.
- Turn the work: After knitting the row, the knitted piece is turned so that the back of the work faces you.
- Wrong side: In the wrong-side row, all stitches are also knitted as knit stitches.
- Repeat: Repeat this process until the knitted piece has reached the desired length.
As knit stitches are always knitted, the result is an even pattern on both sides.



By loading the video you accept the privacy policy of YouTube.
Learn more
What can the pattern be used for?
Thanks to its simplicity and sturdiness, garter stitch is extremely versatile. It is particularly suitable for:
- Scarves and blankets: The dense texture makes garter stitch ideal for warm and stable knitting projects. No border is needed because it does not curl.
- Garments: Thanks to its elasticity and comfortable feel, the pattern is well suited for jumpers, hats and baby clothes.
- Accessories and decoration: Cushion covers, potholders and other home textiles benefit from the texture and firmness of garter stitch.
Garter stitch is perfect for beginner projects in particular, as no complicated patterns need to be counted and simply knitting knit stitches quickly brings a sense of achievement.
Why do you only see purl stitches in garter stitch?
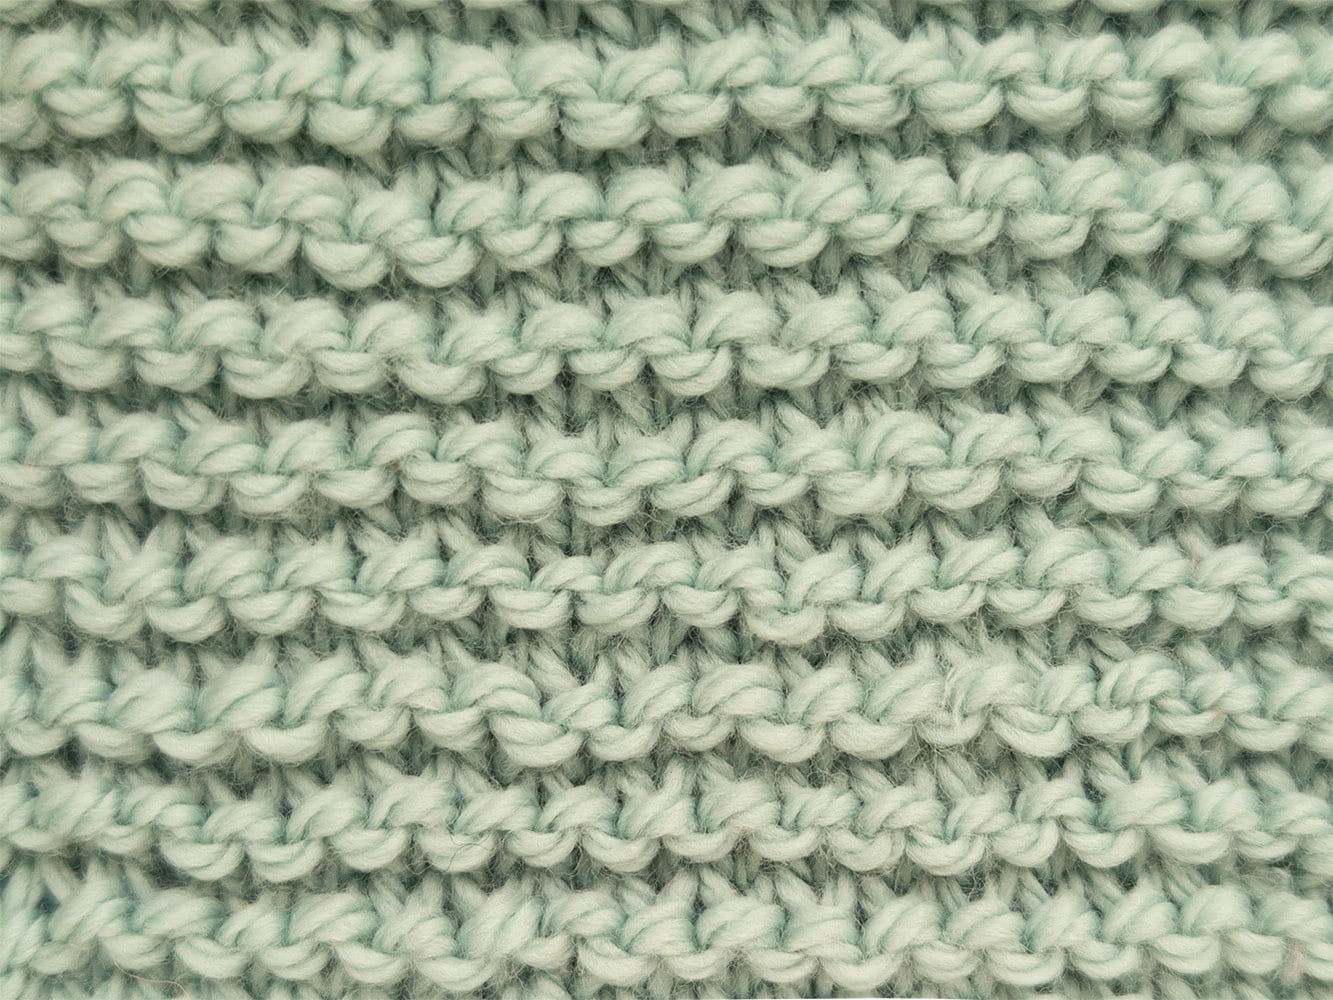
Although only knit stitches are worked in garter stitch, small bumps (purl stitches) and small “v” stitches (knit stitches) appear alternately on the front. This is because the work is knitted back and forth in rows, so purl stitches appear on the back of the knit stitches. This creates the characteristic wavy pattern that looks the same on both sides of the knitted piece.
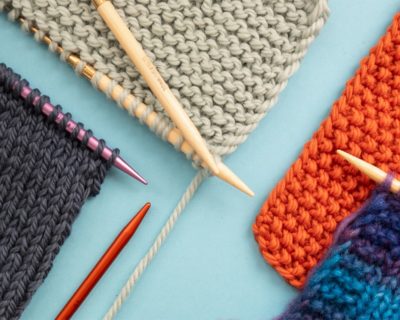
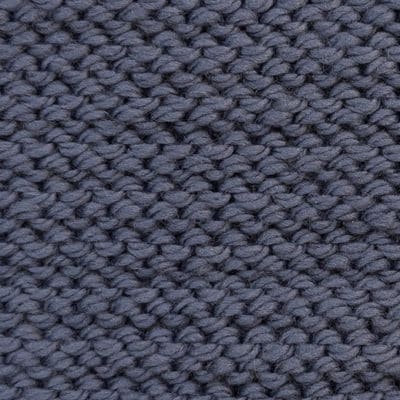
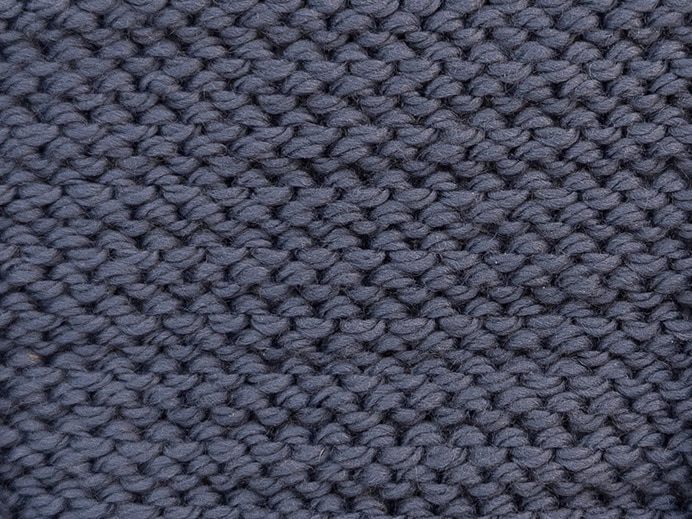
The purl stitches (waves/bumps) stand out more than the knit stitches, which is why it looks as if only purl stitches are visible. If the pattern is stretched a little, the purl and knit rows are easy to see (photo in mint). Purl stitches alone, on the other hand, look like the photo in blue. They consist only of waves.

Why do you only see purl stitches in garter stitch?
Although only knit stitches are worked in garter stitch, small bumps (purl stitches) and small “v” stitches (knit stitches) appear alternately on the front. This is because the work is knitted back and forth in rows, so purl stitches appear on the back of the knit stitches. This creates the characteristic wavy pattern that looks the same on both sides of the knitted piece.
The purl stitches (waves/bumps) stand out more than the knit stitches, which is why it looks as if only purl stitches are visible. If the pattern is stretched a little, the purl and knit rows are easy to see (photo in mint). Purl stitches alone, on the other hand, look like the photo in blue. They consist only of waves.
Garter stitch in rounds
When knitting in rounds, garter stitch is created slightly differently than when knitting in rows. As the work is not turned when knitting in rounds but knitted continuously in one direction, knit and purl stitches have to alternate to create garter stitch:
- One round of knit stitches is knitted, followed by
- one round of purl stitches.
Tip: The beginning of the round can be marked with a stitch marker
This technique creates the same even pattern as knitting in rows, even though the knitted piece is not turned. This method is well suited for many knitting projects.


Garter stitch in rounds
When knitting in rounds, garter stitch is created slightly differently than when knitting in rows. As the work is not turned when knitting in rounds but knitted continuously in one direction, knit and purl stitches have to alternate to create garter stitch:
- One round of knit stitches is knitted, followed by
- one round of purl stitches.
Tip: The beginning of the round can be marked with a stitch marker
This technique creates the same even pattern as knitting in rows, even though the knitted piece is not turned. This method is well suited for many knitting projects.



Our tip for garter stitch:
- Knit loosely: In garter stitch, it helps not to work the stitches too tightly so that the knitted piece stays elastic and does not warp
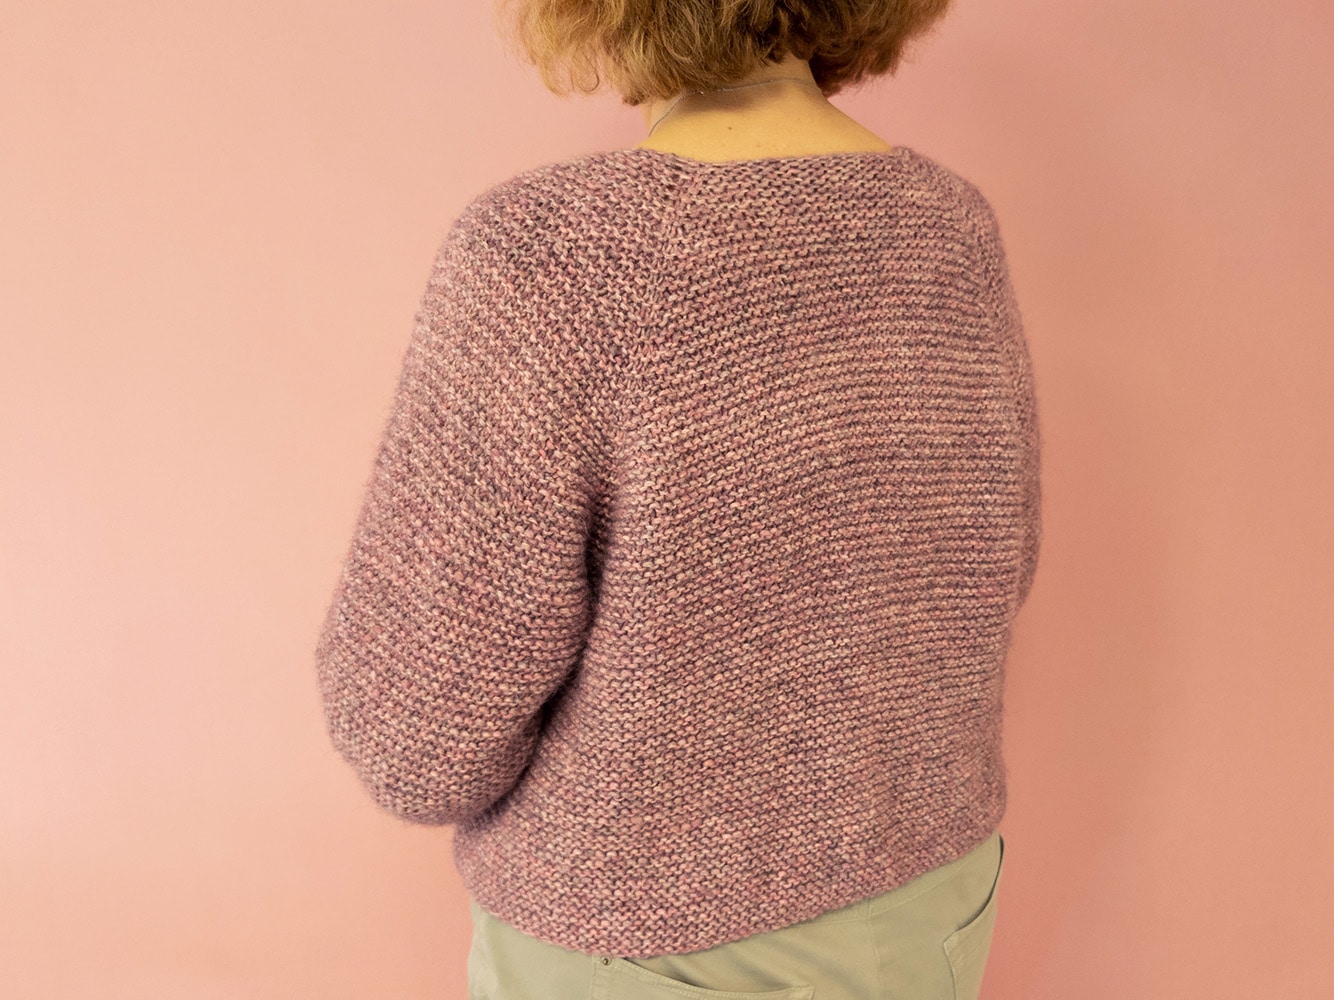
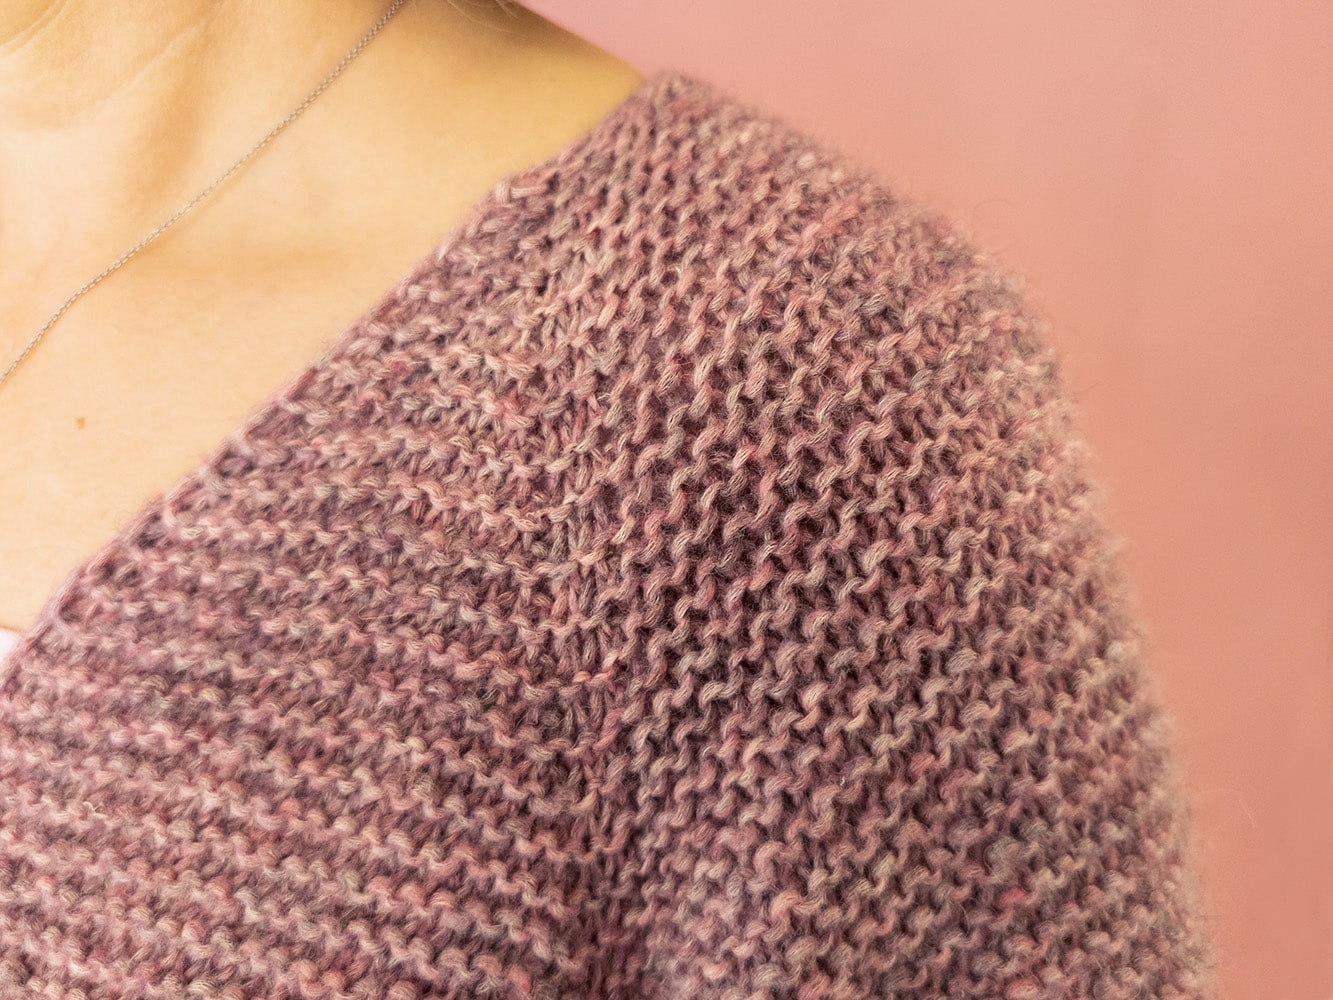
- Crochet around edges: To create a neat edge in garter stitch, the first stitch of each row can be worked as an edge stitch. To do this, simply slip the first stitch of each row with the yarn in front of the needle by lifting it from behind with the right needle without knitting it. The last stitch of the row is ALWAYS knitted. This creates a neat and even edge (V edge as in the photos).


Our tip for garter stitch:
- Knit loosely: In garter stitch, it helps not to work the stitches too tightly so that the knitted piece stays elastic and does not warp
- Crochet around edges: To create a neat edge in garter stitch, the first stitch of each row can be worked as an edge stitch. To do this, simply slip the first stitch of each row with the yarn in front of the needle by lifting it from behind with the right needle without knitting it. The last stitch of the row is ALWAYS knitted. This creates a neat and even edge (V edge as in the photos).